Do you want to send a series of automated drip notifications to your subscribers?
Automated drip campaigns are great for welcoming new users and boosting engagement on your WordPress site. You can use them to guide your users along a specific journey.
In this article, we will show you how to set up automated drip notifications in WordPress using both push notifications and email notifications.
When Should You Use Automated Drip Notifications in WordPress?
Drip notifications are automated messages that are sent to your subscribers, usually in the form of a push notification or an email.
These messages are part of a series, and they are automatically triggered to send at a predefined interval. In other words, they are ‘dripped’ to your subscribers over time rather than ‘poured out’ all at once.
You can use drip campaigns to promote a product, get more pageviews on your WordPress blog, build a relationship with your users, increase sales, and even teach a course over a specific period of time.
Here are a few use cases to get the most out of automated drip campaigns in WordPress:
- You can send an automatic welcome drip notification to new subscribers and customers. This way, you can educate users about your products and services and build brand trust.
- If you are running an eCommerce store, then having automated drip notifications setup can help upsell and cross-sell different products upon purchase.
- You can promote your most important content and get people to revisit your website.
- Using drip notifications, you can show targeted messages to people from different regions. This helps get more conversions based on geographic segmentation.
- You can get people to register for your webinars and upcoming events using automated drip notifications.
In this guide, we will cover push notifications and email drip campaigns. You can click the links below jump to your preferred method :
How to Set Up an Automated Push Notification Drip Campaign
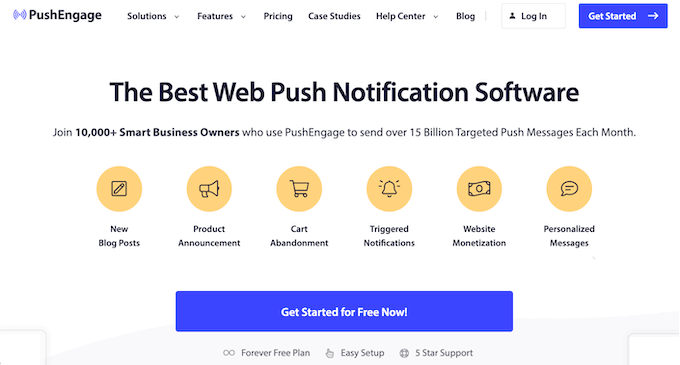
The easiest way to set up automated push notifications is with PushEngage. It’s the best web push notification software for WordPress, and over 10,000 businesses use it to send targeted messages.
First, you will need to visit the PushEngage website and click the ‘Get Started for Free Now’ button.
Next, you will need to select a pricing plan that meets your needs. PushEngage offers a free plan that includes 30 campaigns and up to 200 subscribers.
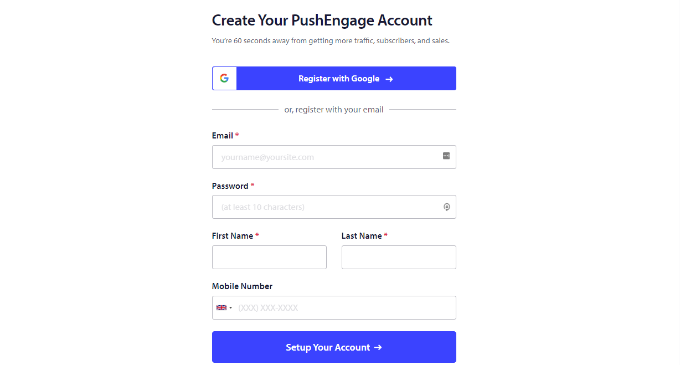
After selecting a pricing plan, you can create an account or register with a Google account.
Upon signing in to your account, you will see the PushEngage dashboard.
The tool will then take you to Site Settings » Site Details and ask you to enter your website details, like your site name, domain name, site icon, and more.
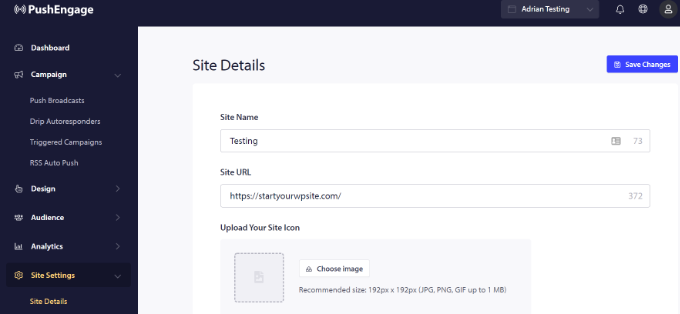
If you scroll down further in the ‘Site Details’ section, you can generate the API key for connecting PushEngage with different platforms, select a time zone, and enable geolocation.
There is also an option to remove the ‘Powered by PushEngage’ branding.
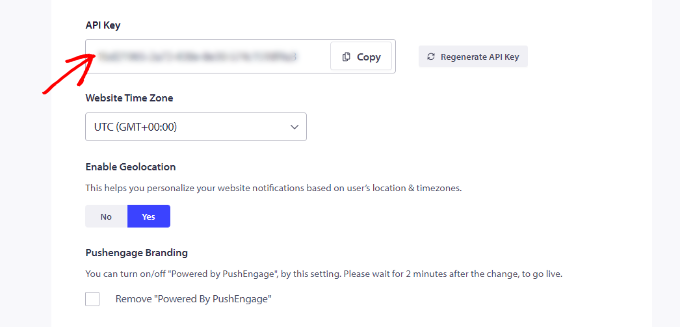
Next, you will need to connect your WordPress website with PushEngage.
First, you’ll need to install and activate the PushEngage WordPress plugin. If you need help, then please see our guide on how to install a WordPress plugin.
Upon activation, you will see the PushEngage setup wizard. Go ahead and click the ‘Connect Your Existing Account’ button.
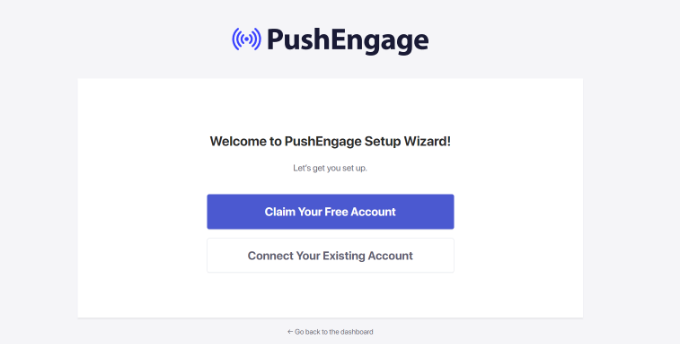
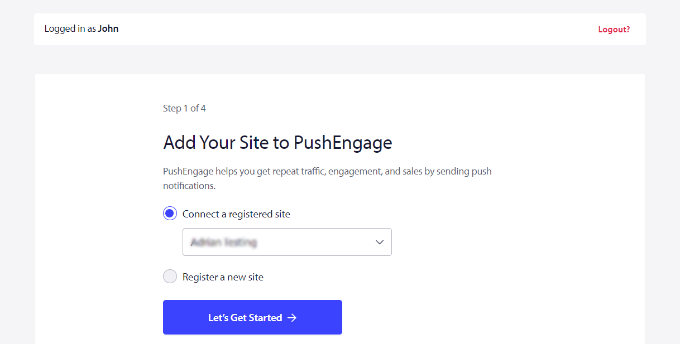
A new popup window will now open.
You can then select your website from the dropdown menu and click the ‘Let’s Get Started’ button.
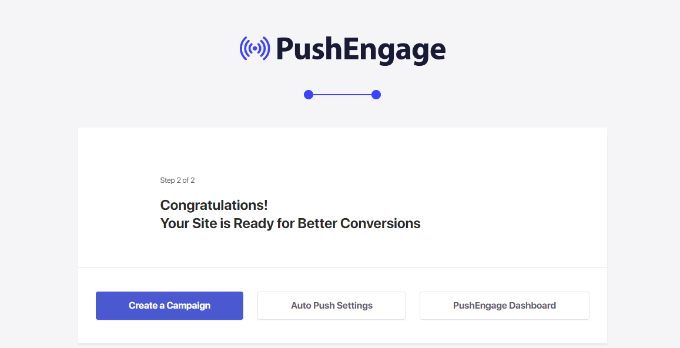
Next, you will see a success message that PushEngage is connected to your website.
You can go ahead and select the ‘PushEngage Dashboard’ option to close the setup wizard.
You can follow our detailed guide on how to add web push notifications to your WordPress site for more details.
Next, you can set up automated drip notifications using PushEngage. For this example, we will create a welcome campaign for new subscribers.
To start, you can head to PushEngage » Drip from the WordPress dashboard. After that, click the ‘Add New’ button.
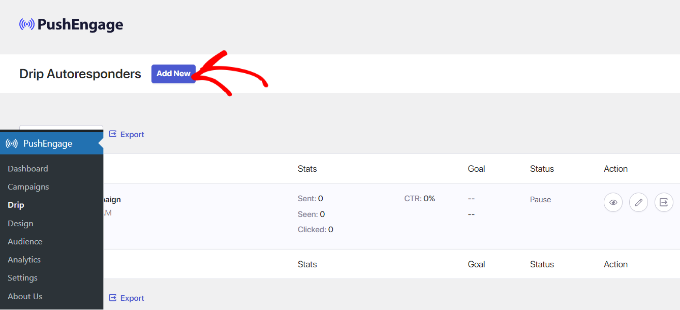
After that, you can add different push notifications and edit the content you want to display.
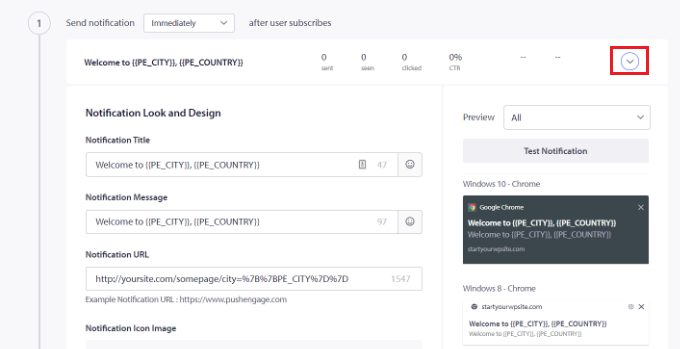
Go ahead and click the arrow at the end of the notification to see more options.
For each notification, you can change the notification title, message, URL, icon image, and more by expanding each notification. There’s also a preview of how your notifications will look in the browser.
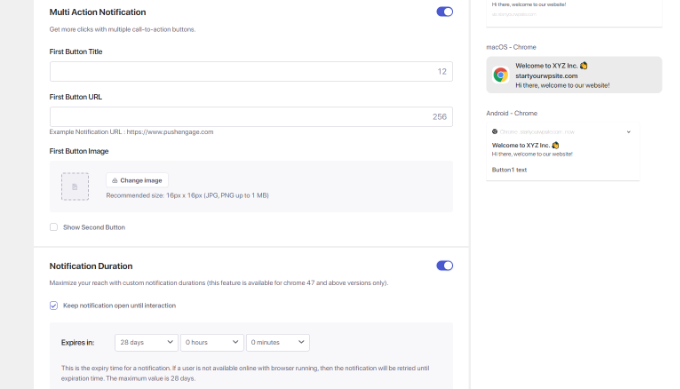
If you scroll down, then you’ll find more options, like showing multi-action notifications. Here, you can show call-to-action buttons on the push notifications and edit their text.
There is also an option to enable notification duration. This allows you to set an expiration time for your notification.
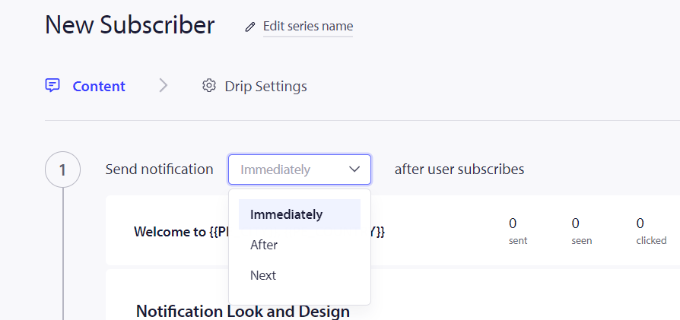
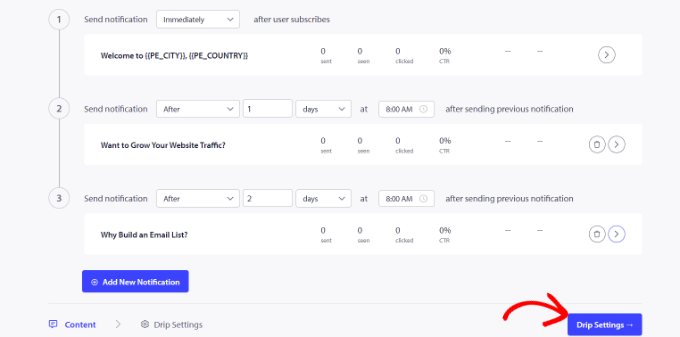
PushEngage also lets you choose when to send each notification. For example, you can send the first notification immediately and select a different time for the following notification.
To select when you’d like to send the push notification, simply click the ‘Send notification’ dropdown menu.
To add another notification to the drip campaign, simply click the ‘Add New Notification’ button at the bottom.
Once you’ve added all the notifications, simply click the ‘Drip Settings’ button.
Next, you can choose whether you’d like to send the notifications to all your subscribers or a specific audience group that you create.
PushEngage lets you segment your subscribers and create different groups. For this tutorial, we choose the ‘Send to All Subscribers’ option.
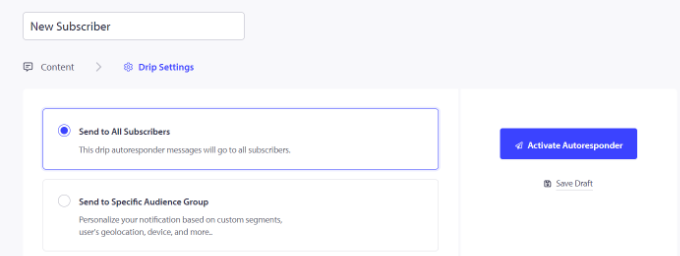
After that, you can simply click the ‘Activate Autoresponder’ button to enable automated push notifications for your WordPress website.
You can then go to PushEngage » Drip from your PushEngage dashboard and see the drip notifications as ‘Active’.
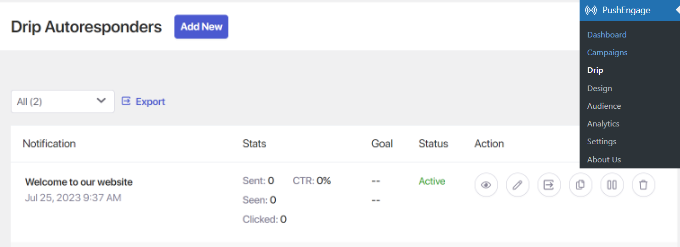
That’s it! You have set up an automated push notification drip campaign for your site.
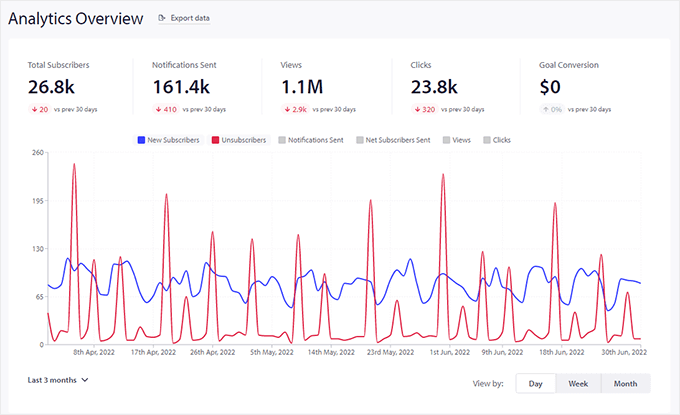
Now you will be able to get detailed stats on its performance in the Analytics section of your PushEngage account.
Set Up Automated Drip Notifications Using an Email Marketing Tool
Another way you can create automated drip notifications in WordPress is by using an email marketing tool.
We recommend using Constant Contact because it’s the best email marketing service on the market. It’s super easy to use and offers a drag-and-drop email builder.
However, the drip email notification functionality exists in all major email marketing platforms, including Brevo (formerly Sendinblue), HubSpot, and others.
You can set up email automation in just a few clicks and send email series to your subscribers with ease. Plus, Constant Contact integrates with WordPress plugins like WPForms and OptinMonster.
It even works with eCommerce platforms like WooCommerce and Shopify, so you can automate emails for new customers or help recover abandoned carts.
To start, you can visit the Constant Contact website and create an account. The best thing about using this software is that you get a 60-day free trial. This way, you can try out the tool before committing to a premium plan.
If you use our Constant Contact coupon code, then you can also get 20% off by purchasing upfront.
After creating an account, you can visit the Constant Contact dashboard to create a contact list.
Constant Contact will have already created a default list for you. However, you can create your own list by going to the ‘Contacts’ tab in the top menu and then clicking the ‘Create List’ button.
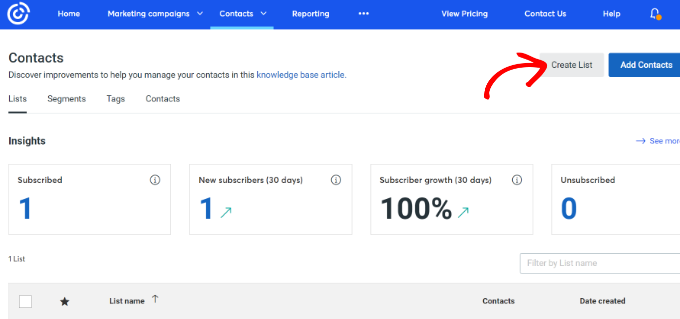
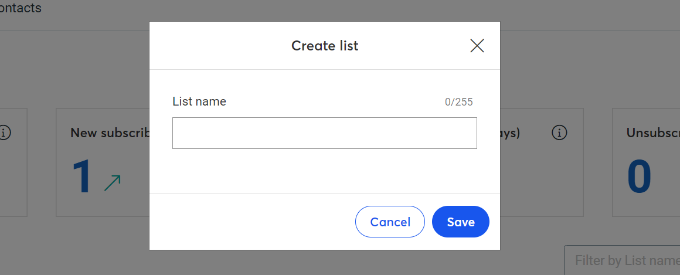
Next, a popup window will appear where you will need to enter a name for your list.
Simply click the ‘Save’ button after entering a name.
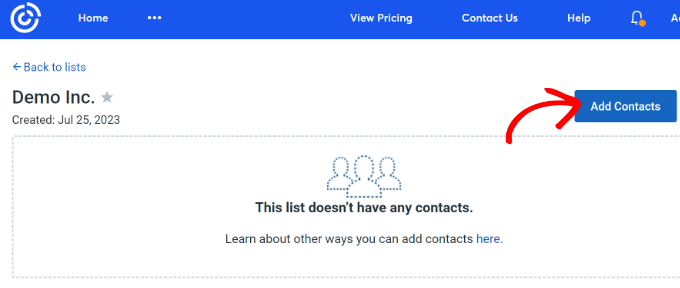
After that, you can add contacts to your email list.
You can manually add contacts by going to the ‘Contacts’ tab and clicking the ‘Add Contacts’ button.
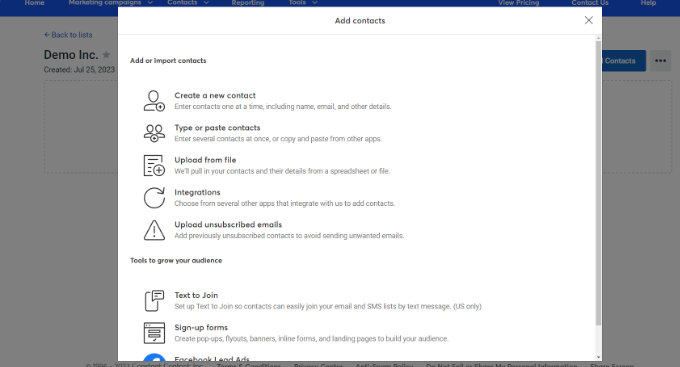
A popup window will open with multiple options for adding new contacts.
You can connect your WordPress newsletter form with Constant Contact and start building an email list. For more details, see our guide on how to add email subscriptions to your WordPress blog.
Alternatively, you can manually create new contacts, upload a spreadsheet or CSV file, or integrate with lots of other platforms to import saved email addresses.
Now that you’ve added subscribers to your Constant Contact list, the next step is to create an automated drip campaign.
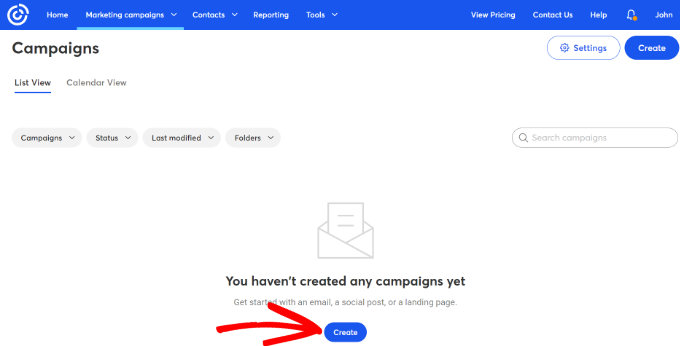
To do that, head over to the ‘Marketing campaigns’ tab and then click the ‘Create’ button.
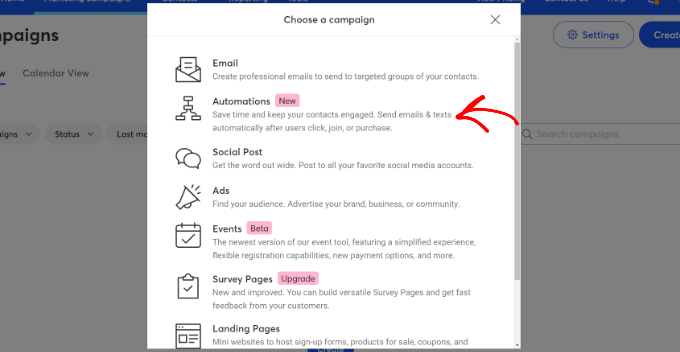
Next, Constant Contact will show you multiple options for creating a campaign.
Go ahead and select the ‘Automations’ campaign.
From here, Constant Contact will show you multiple templates to choose from.
You can select a pre-built template and customize it according to your requirements or create an automation path from scratch.
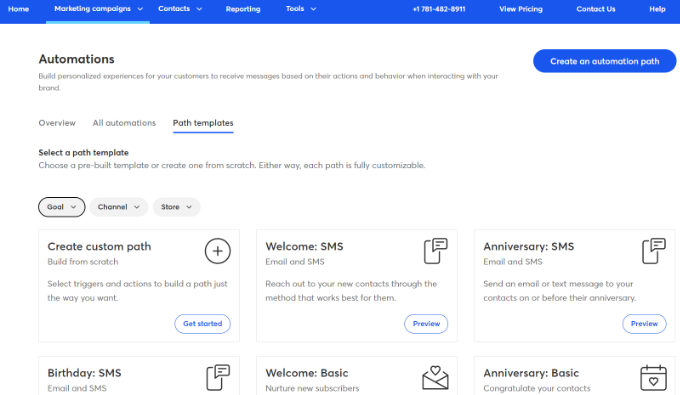
For this tutorial, we will select the ‘Create custom path’ template option.
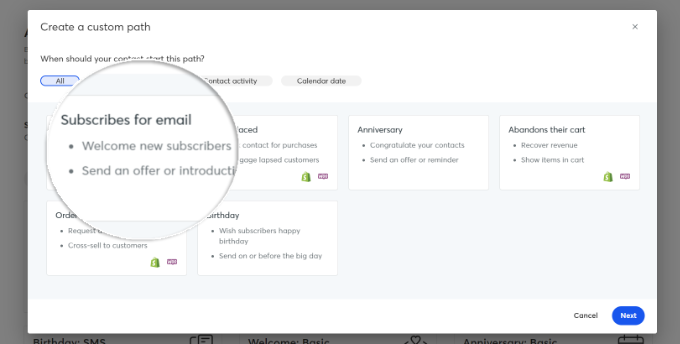
After that, you will need to select when your contact starts the path. Constant Contact will show different options.
You can go ahead and choose the ‘Subscribes for email’ option and then click the ‘Next’ button.
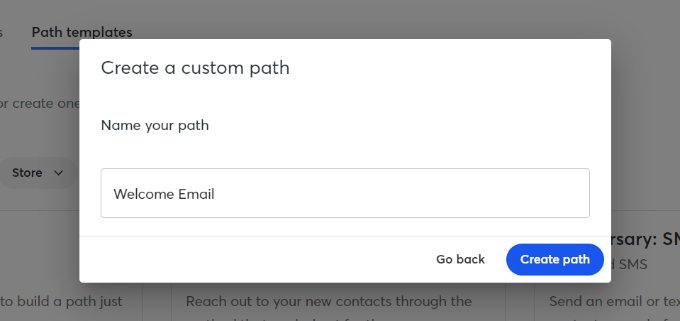
Next, you will have to enter a name for your custom path.
Once that’s done, simply click the ‘Create path’ button.
This will launch the Path Builder, where you can create an automated workflow.
By default, you will see the Trigger for your path. In this case, it’s when someone subscribes to any list.
However, you can simply drag actions and rules from the menu on the left onto the path. For instance, you add different actions like sending an email or sending an SMS to your workflow.
There are also different rules that help you customize your automation. You can add a time delay and specify when the next email should be sent. Similarly, there is a conditional split option that lets you set up Yes and No conditions and split the path.
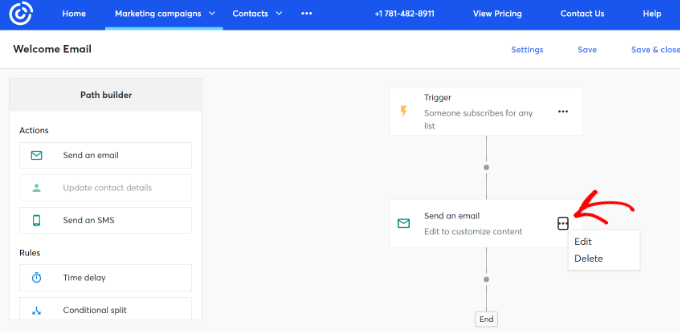
You can also edit each action in the automated workflow. Simply click the 3 dots icon and select the ‘Edit’ option. For example, let’s edit the Send an email action.
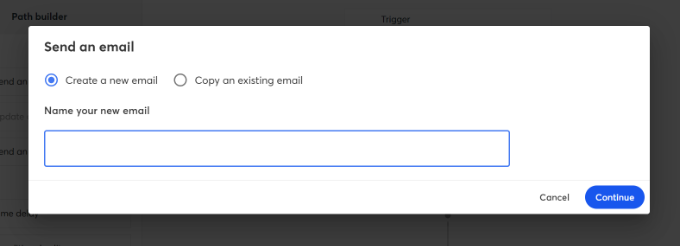
Next, a popup window will open where you create a new email or copy an existing email.
Since we are creating the workflow for the first time, go ahead and select the ‘Create a new email’ option, enter a name for your email, and click the ‘Continue’ button.
After that, Constant Contact will show you multiple email templates.
You can also search for a template based on the occasion or use a blank template to create an email from scratch.
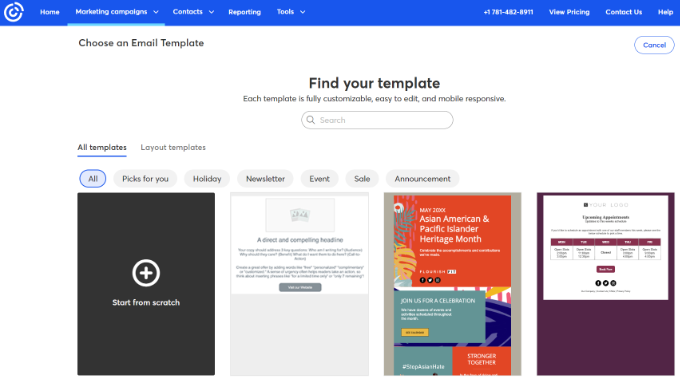
Once you select a template, the email editor will launch.
You can add different blocks to the template, edit existing text, customize the design, and more.
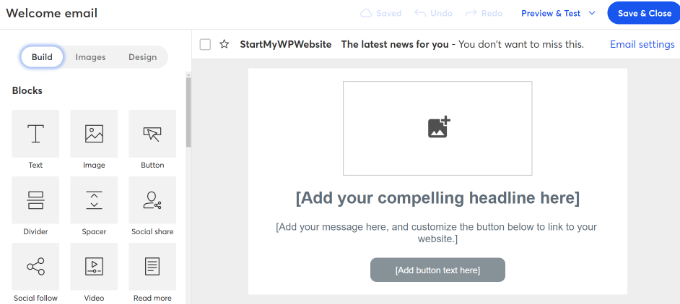
When you are done, simply click the ‘Save & Close’ button at the top.
You will now return to the Path Builder in Constant Contact. Go ahead and finish your automation path by adding as many actions and rules to your path and editing each one of them.
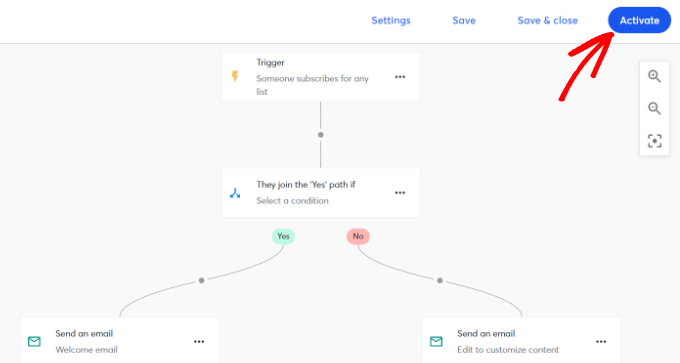
After creating an automated workflow, you can simply click the ‘Activate’ button at the top.
That’s it! You’ve now successfully launched an automated drip notification campaign using an email marketing tool.
Bonus: Grow Your Email List in WordPress
In the second method of this tutorial, we showed you how to set up email drip notifications. But before you can send out your emails, you will need a list of subscribers.
Here are a few tips to grow your email list:
For more ideas, you can see our complete guide on how to grow your email list. You may also want to read our article on how to start an email newsletter to help you design better email campaigns.
We hope this article helped you learn how to set up automated drip notifications in WordPress. You may also want to check out our expert pick of the best WordPress plugins to grow your business and our ultimate WordPress SEO guide to improve your SEO rankings and get more traffic.
If you liked this article, then please subscribe to our YouTube Channel for WordPress video tutorials. You can also find us on Twitter and Facebook.
این خبر را در ایران وب سازان مرجع وب و فناوری دنبال کنید