Do you want to create a video portfolio in WordPress?
Videos are an engaging medium that can display your skills and creativity in a way that static images can’t. By default, you can easily embed videos in WordPress, but you can’t display them in a portfolio-style layout.
In this article, we will show you how to easily create a video portfolio in WordPress without slowing down your website or writing code.
How to Get Started with Your Video Portfolio
First, you will need to start a WordPress blog or a website. If you already have one, then you can move to the next step.
WordPress allows you to easily embed videos in your blog posts and pages. However, it does not let you create a beautiful video portfolio out of the box.
For your portfolio, you will want to display your videos in a nice grid-based layout so that more videos can be viewed without a lot of scrolling.
You also need to make sure that the portfolio works on mobile devices and offers a good user experience. This can help improve your website rankings, as high-quality video content can lead to more organic traffic.
While you can upload a video to your WordPress site, we recommend using a third-party service like YouTube or Vimeo because videos are resource-intensive and can slow down your site.
For more details, you may want to see our article on why you should never upload videos to WordPress.
That being said, let’s take a look at how to easily create a video portfolio in WordPress, step by step.
Creating a Video Portfolio in WordPress With Envira Gallery
You can easily create a video portfolio in WordPress with Envira Gallery. It is the best WordPress gallery plugin on the market that comes with a video addon.
The plugin lets you create beautiful galleries and offers premade templates, watermarking, a lightbox feature, and much more.
First, you need to install and activate the Envira Gallery plugin. For detailed instructions, see our step-by-step guide on how to install a WordPress plugin.
Note: Envira Gallery also has a free plan. However, you will need a premium plan to unlock the Videos addon.
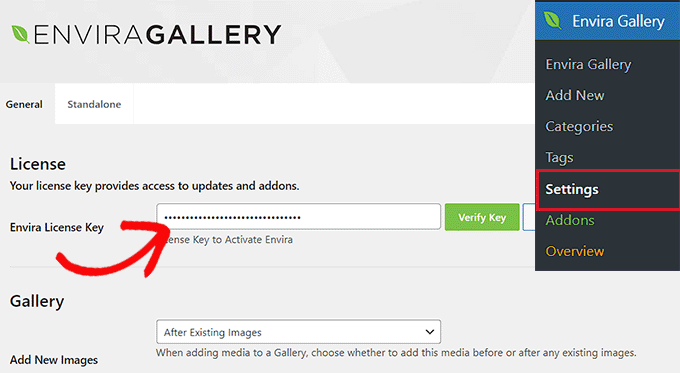
Upon activation, visit the Envira Gallery » Settings page from the WordPress dashboard to enter your license key. You can get this information from your account on the Envira Gallery website.
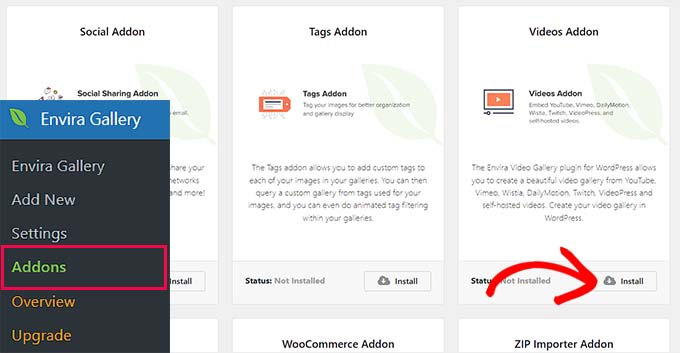
Next, you must head to the Envira Gallery » Addons page and locate the ‘Videos’ addon.
Once you do that, click the ‘Install’ button next to it. After that, you need to click ‘Activate’ to start using it on your website.
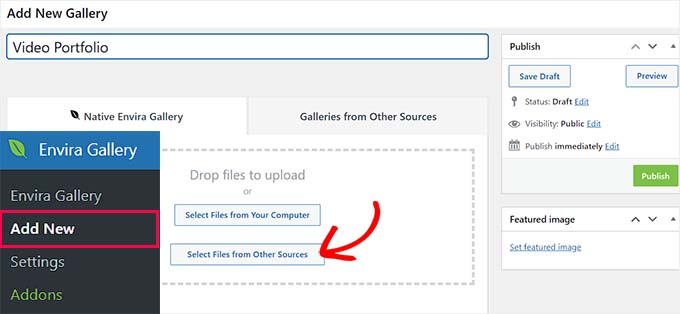
Now, it’s time for you to start creating your video portfolio. To do this, go to the Envira Gallery » Add New page from the WordPress admin sidebar.
Keep in mind that Envira Gallery allows you to create a gallery of your self-hosted videos as well as videos hosted on platforms like YouTube, Wistia, and Vimeo.
However, we recommend using third-party video hosting services to avoid performance issues or problems with your WordPress hosting.
Upon uploading your videos on YouTube or Vimeo, you can add a name for your gallery and then click the ‘Select Files from Other Sources’ button.
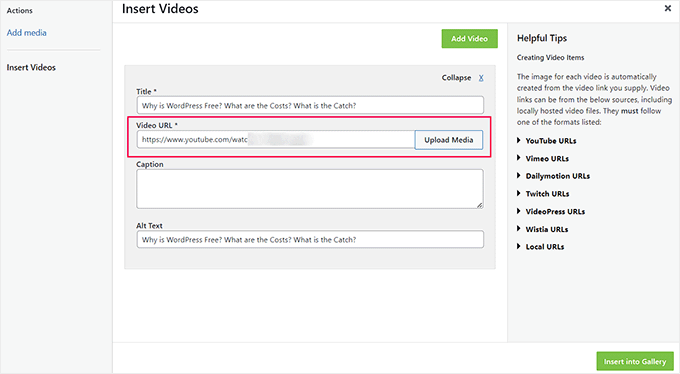
This will launch the media library, where you have to switch to the ‘Insert Videos’ tab.
Here, you can add your video’s title, caption, and alt text. Once you do that, just add the video URL in the ‘Video URL’ field.
If you want to upload a video from your computer, then you can click the ‘Upload Media’ button.
You can also add more videos by clicking on the ‘Add Video’ button at the top. Then, repeat the process until you have added all the videos you wanted to show in your portfolio.
Once you are done, simply click the ‘Insert into Gallery’ button.
Envira will now show the thumbnails it fetched from your videos in the ‘Currently in your Gallery’ section.
Here, you can click the pencil icon on top of each thumbnail to change the alt text and captions, video heights, widths, and more.
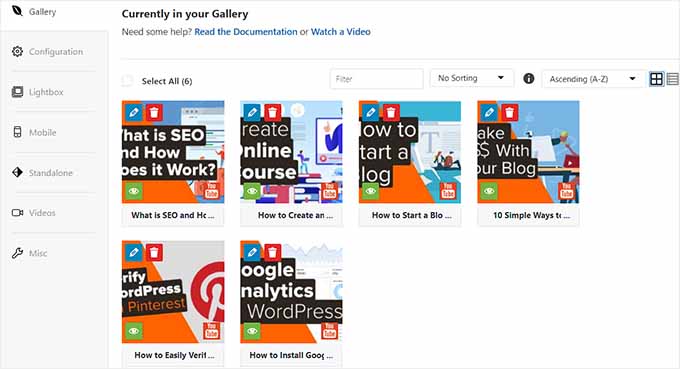
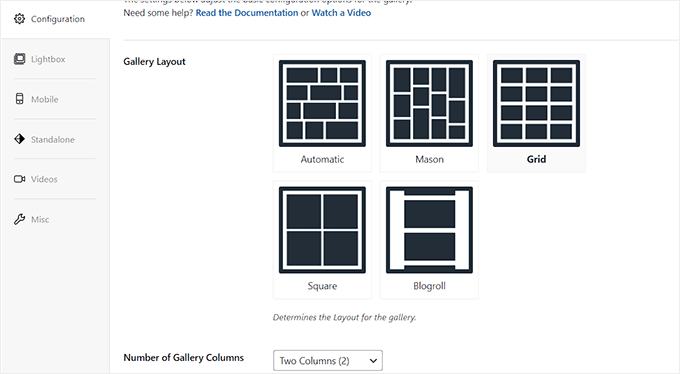
Once you have done that, just switch to the ‘Configuration’ tab.
You can now choose your gallery layout, add gallery columns, enable lazy loading, change image dimensions, and add captions under the videos.
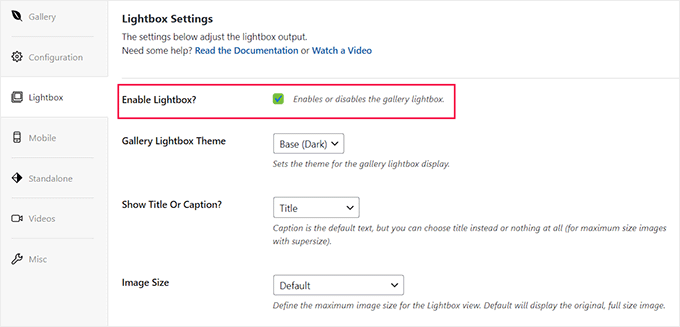
After that, switch to the ‘Lightbox’ tab from the left column and check the ‘Enable Lightbox’ option. Your videos will now play on the same page in a lightbox popup.
For detailed instructions, you can see our tutorial on how to add a gallery in WordPress with a lightbox effect.
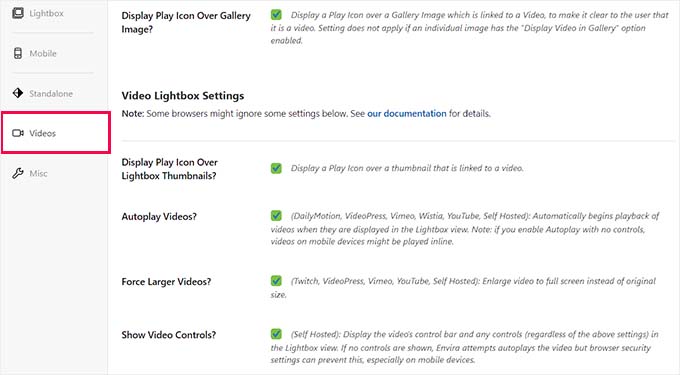
Next, switch to the ‘Videos’ tab and check the box next to the ‘Display play icon over gallery image’ option. That way, users can click on the play button to start watching your videos.
After that, you can scroll down to the ‘Video Lightbox Settings’ section and enable video autoplay, display video controls, add a progress bar or current time, enable video download, and more.
You can then also configure other gallery settings according to your liking. Once you are done, click the ‘Publish’ button at the top to store your settings.
Next, open the WordPress page or post where you want to add your video portfolio. Here, click the ‘+’ add block button to open the block menu and add the Envira Gallery block.
Once you do that, select the video portfolio gallery that you just created from the dropdown menu within the block itself.
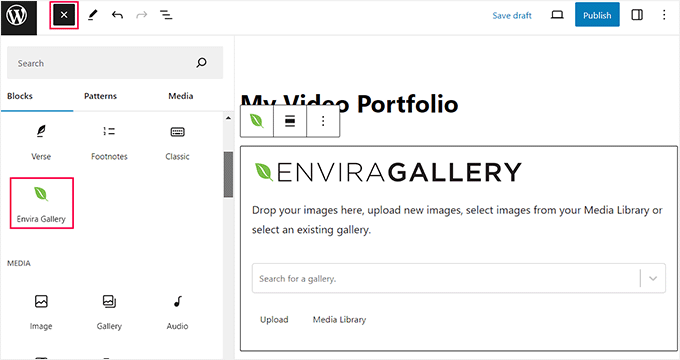
Finally, click the ‘Publish’ or ‘Update’ button to store your settings.
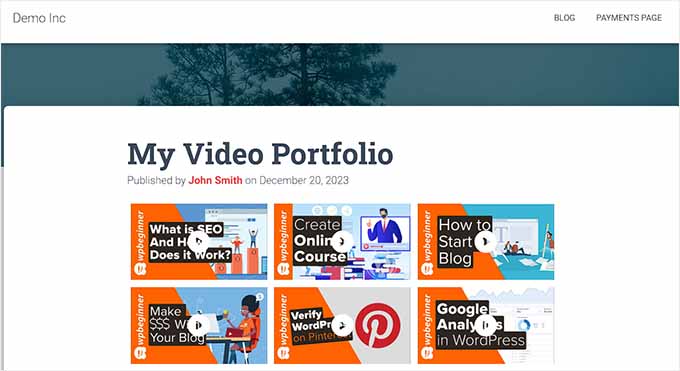
You can now visit your WordPress site to view the video portfolio. This is what it looked like on our demo WordPress website.
Bonus: Add Your YouTube Feed to Your WordPress Site
Apart from creating a video portfolio, you can also add your entire YouTube feed to your WordPress site to drive traffic to your channel and increase user engagement.
This can also help improve your website rankings and allow you to showcase your skills and creativity within the video feed.
You can easily add a YouTube feed in WordPress with the Smash Balloon YouTube Feed plugin. It is the best WordPress YouTube gallery plugin on the market that comes with multiple feed types, customizable layouts, social sharing, and live stream support.

Upon plugin activation, all you have to do is connect your YouTube channel with WordPress.
Once you do that, your YouTube feed will be launched in the Smash Balloon builder, where you can customize the layout, add a subscribe button, change color schemes, and edit individual elements.
For detailed instructions, you can see our tutorial on how to create a video gallery in WordPress.
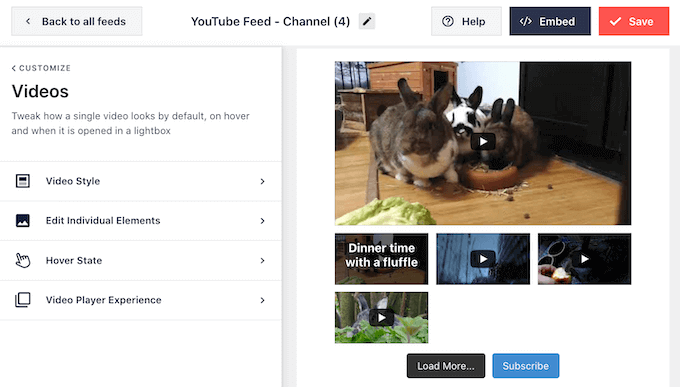
Apart from YouTube, you can also use other Smash Balloon plugins to embed your Facebook, Instagram, or Twitter feeds within your website.
For more information, just see our complete Smash Balloon review.
We hope this article helped you learn how to create a video portfolio in WordPress. You may also want to see our beginner’s guide on how to boost WordPress speed and performance and our top picks for the best WordPress portfolio themes for your site.
If you liked this article, then please subscribe to our YouTube Channel for WordPress video tutorials. You can also find us on Twitter and Facebook.
این خبر را در ایران وب سازان مرجع وب و فناوری دنبال کنید
