How to Accept Giropay Payments in WordPress (The Easy Way)
Do you want to easily accept Giropay payments on your WordPress site?
Giropay is a popular payment method, with over 40 million users in Germany and Austria. By offering this preferred payment method, you can build trust and increase conversions on your website in some European countries.
In this article, we will show you how to accept Giropay payments in WordPress.
Why Accept Giropay Payments in WordPress?
If you are selling products or services on your WordPress website or asking for donations, then it’s important to let your visitors pay using their preferred method.
Many customers will want to pay by credit card or PayPal. However, in Germany, 10% of checkouts are completed using Giropay.
That means if you have customers in Germany and Austria, then adding Giropay as a payment method in your online store is an easy way to boost sales.
Giropay is a German payment method that is based on online banking. You have the benefit of receiving the payment directly from the customer’s bank account as soon as they complete the checkout. Also, fees are lower than when using other payment methods.
Plus, German and Austrian banks have advanced fraud detection, protecting both you and your customers.
With that being said, let’s take a look at how to accept Giropay payments in WordPress.
How to Accept Giropay Payments in WordPress
The first thing you need to do is install and activate the WP Simple Pay plugin. For more details, see our step-by-step guide on how to install a WordPress plugin.
WP Simple Pay is one of the best WordPress invoicing and payments plugins for small businesses and the easiest way to accept Giropay payments in WordPress. It can be used without setting up a complex shopping cart system and doesn’t charge any additional transaction fees.
Note: While there is a free version of the plugin, you will need the Pro plugin to create the on-site payment form needed in this guide.
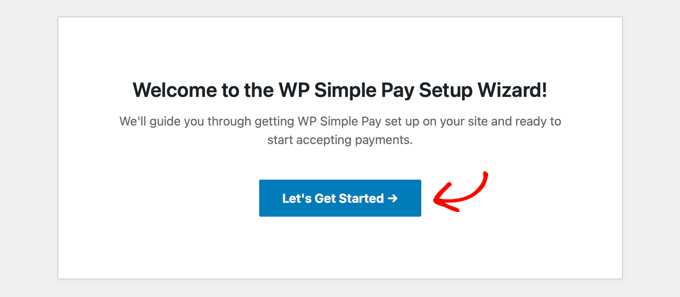
Upon activation, the WP Simple Pay setup wizard will start automatically.
Simply click the ‘Let’s Get Started’ button.
In the first step, you will be asked to enter your license key.
You can find this information in the account area of the WP Simple Pay website.
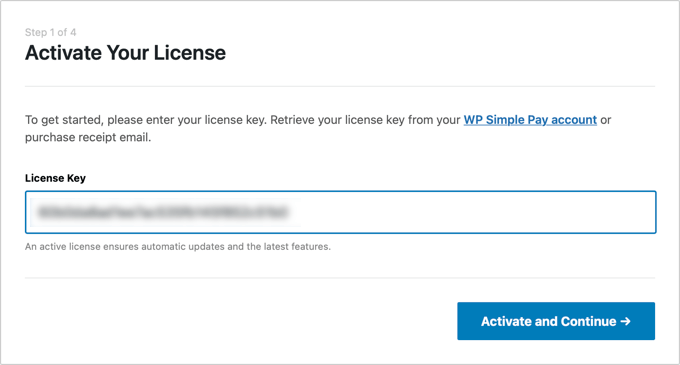
Once you have entered the license key, you can click the ‘Activate and Continue’ button to move to the next step.
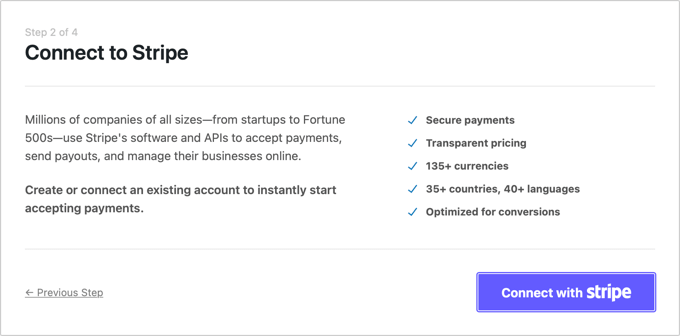
Now, you will need to connect WP Simple Pay to Stripe. Stripe is a popular payment gateway that supports Giropay along with all top credit and debit cards, Google Pay, Apple Pay, and more.
When you click the ‘Connect with Stripe’ button, you will need to log in to your Stripe account or create a new one. Anyone with a legitimate business can create a Stripe account and accept payments online.
Note: Stripe requires your site to be using SSL/HTTPS encryption. If you don’t already have an SSL certificate for your website, then please see our step-by-step guide on how to add SSL in WordPress.
After logging in to Stripe, you will be asked to configure your WP Simple Pay emails.
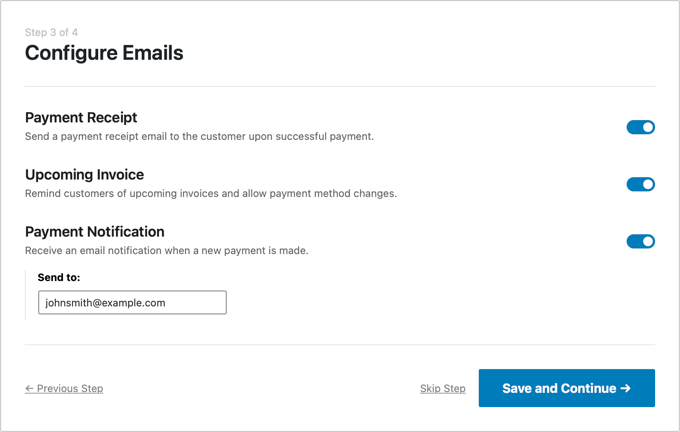
The three email options have already been enabled for you. These are for sending receipts and invoice reminders to your customers and payment notification emails to yourself.
All you need to do is enter the email address where the notifications should be sent and then click the ‘Save and Continue’ button.
This will bring you to the last step in the setup wizard, where you will create a payment form. Simply click on the ‘Create a Payment Form’ button to get started.
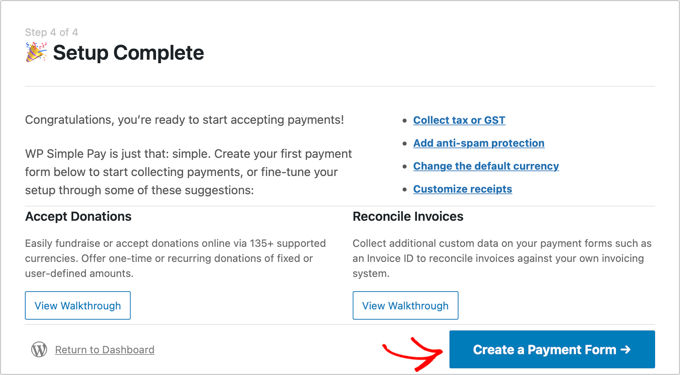
Creating a Payment Form in WordPress
You will now be taken to the Add New Payment Form screen. Here, you will be offered a number of payment form templates.
Tip: You can also create a payment form in WP Simple Pay by going to WP Simple Pay » Add New from your WordPress dashboard.
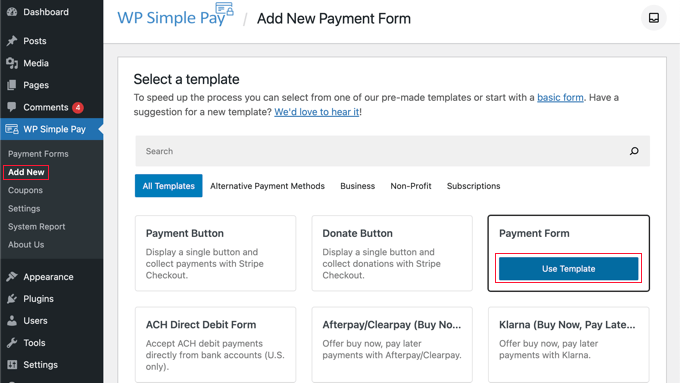
You need to hover over the ‘Payment Form’ template and then click the ‘Use Template’ button that appears.
This will take you to a screen where you can customize the new payment form.
For example, in the General tab, you will find options to customize the form’s title and description. You can leave the form’s type as ‘On-site payment form’.
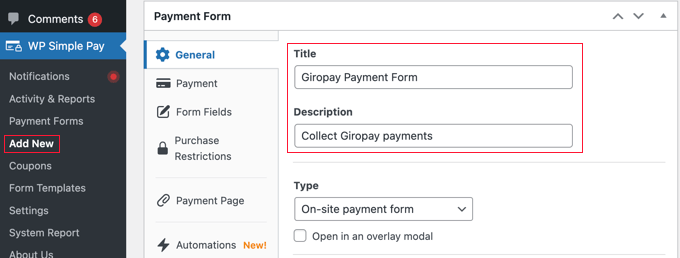
Now you can click on the Payment tab and set the payment mode to either ‘Live Mode’ or ‘Test Mode’.
‘Test Mode’ will let you make payments that are not actually charged to Giropay. This lets you test your form to make sure it is working properly and that emails are being sent.

Don’t forget to change this to ‘Live Mode’ when you have finished testing, or you will not receive payments from your customers.
In the Price Options section, you can add multiple prices with different labels. You can specify the cost of the product or service, the currency, whether it is a one-time payment or a recurring subscription, and more.
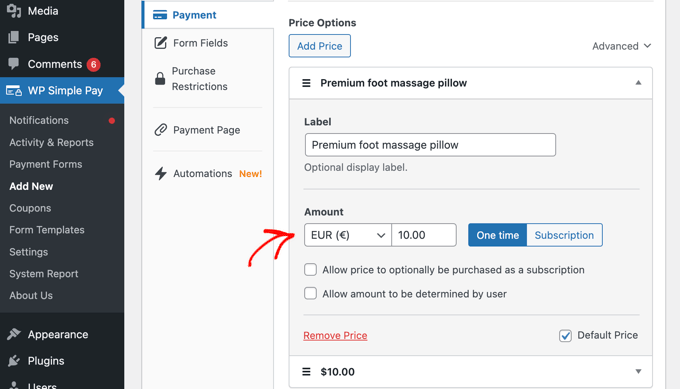
Giropay is paid in Euros, so make sure you select ‘EUR’ from the currency drop-down menu under ‘Amount’.
Now, you can scroll down to the Payment Methods section and select all of the payment methods you wish to use on the payment form. To see the Giropay option, you need to change the list from ‘Popular’ to ‘All’ using the dropdown menu.
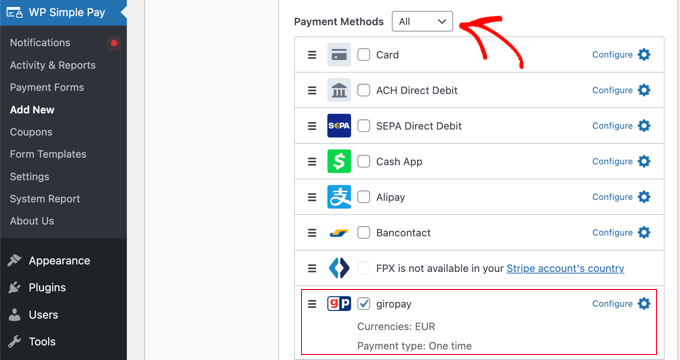
Once you find the ‘giropay’ option, simply check the box next to it. If you like, then you can also check the boxes of other payment methods you wish to use, such as Card, ACH, Alipay, and Klarna.
Next, you should switch to the Form Fields tab and select the fields you wish to display on the payment form.
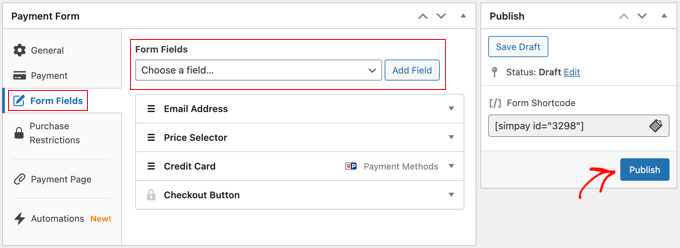
The defaults will work well for many websites, but there are plenty of additional fields, including name, phone, coupon, and more.
Once you have added the fields you need, make sure you click the ‘Publish’ button. Now, you are ready to add the payment form to your WordPress website. There are two ways to do this.
Create a Dedicated Giropay Payment Page
The first method allows you to quickly create a dedicated payment page.
Simply go to the Payment Page tab and click the box labeled ‘Enable a dedicated payment page’.
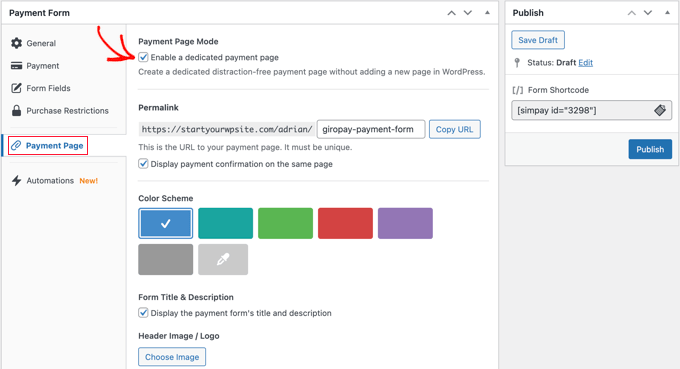
This will display settings where you can select a permalink for the page, choose a color scheme, add a header image or logo, and add some text to the footer.
When you are done, simply click the ‘Publish’ button, and the page will be created.
This is how it looks on our test website.
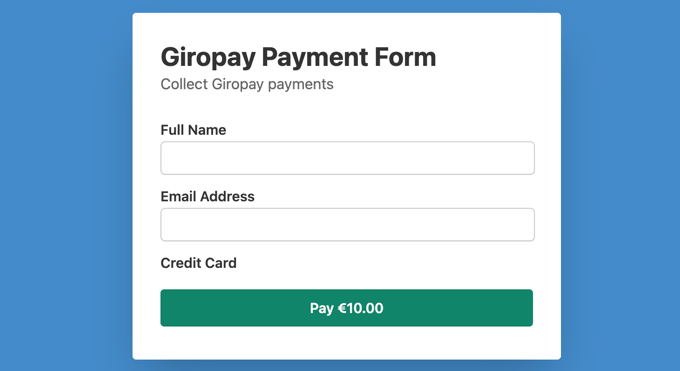
You may wish to add this page to your navigation menu or link to it from a post, page, or widget.
Add the Giropay Payment Form to an Existing Post or Page
The second method lets you add the payment form you created to any post or page on your website.
Simply edit the post or page, and then drag the WP Simple Pay block in the WordPress block editor.
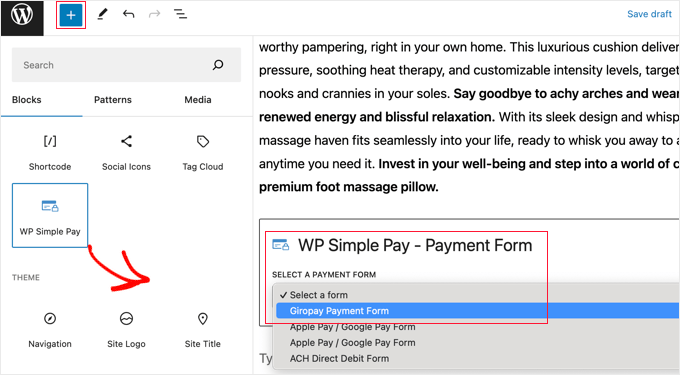
After that, select your order form from the dropdown menu in the WP Simple Pay block.
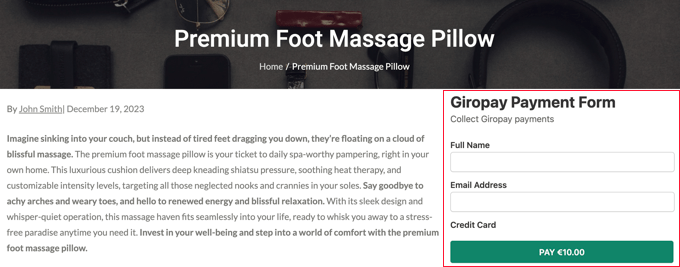
Once you are finished, you can update or publish the post or page and then click on the ‘Preview’ button to see your form in action.
Expert Guides for Accepting Payments in WordPress
Now that you know how to add Giropay payments to your website, you may like to see some guides on adding other payment methods in WordPress:
We hope this tutorial helped you learn how to accept Giropay payments in WordPress. You may also want to see our guide on how to add “buy now pay later” payment plans to WordPress or our expert pick of the best Stripe payment plugins for WordPress.
If you liked this article, then please subscribe to our YouTube Channel for WordPress video tutorials. You can also find us on Twitter and Facebook.
این خبر را در ایران وب سازان مرجع وب و فناوری دنبال کنید
مشاهده پاسخ های این مطلب
———————————————
این مطلب از سایت انجمن وردپرس گردآوری شده است و کلیه حقوق مطلق به انجمن وردپرس می باشد در صورت مغایرت و یا بروز مشکل اطلاع دهید تا حذف گردد
منبع: انجمن وردپرس
