How to Display Nutrition Facts Labels in WordPress
Are you looking for a way to display nutrition facts labels in WordPress?
Nutrition facts labels provide information about the nutrient content of food, including the number of calories, protein, fat, carbohydrates, and more. These labels help users make better-informed health decisions according to their diets.
In this article, we will show you how to easily add nutrition facts labels in WordPress.
Why Add Nutrition Facts Labels in WordPress?
If you are a food blogger or sell food items in your online store, then adding nutrition facts labels along with your recipes and products can help you comply with any regulatory food requirements.
By informing consumers about the calorie content, carbs, protein, and other nutrients of your meals, you also enable them to make informed decisions about their diets.
For instance, adding a nutrition facts label with a recipe will allow diabetic people to monitor their sugar intake and remain healthy.
Adding nutrition facts labels can also boost the SEO rankings of your WordPress blog. This is because search engines usually prioritize websites that enhance the user experience by providing relevant information about their products.
That being said, let’s see how you can easily add nutrition facts labels in WordPress.
How to Add Nutrition Facts Labels in WordPress
You can easily add nutrition facts labels in WordPress using Nutrifox.
It is an online nutrition label generator that allows users to create and customize nutrition labels for their food products or recipes.
Create a Nutrition Facts Label With Nutrifox
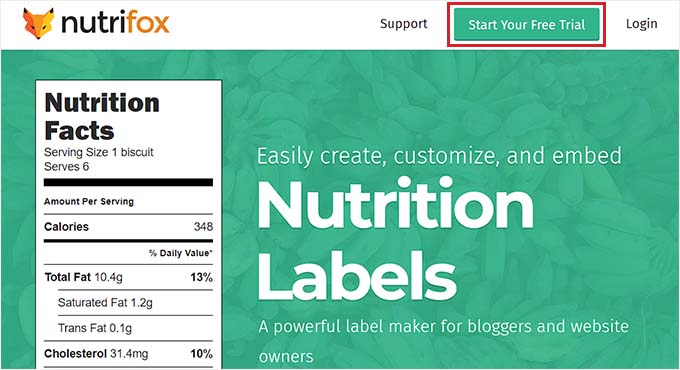
First, you will need to visit the Nutrifox website and sign up for an account by clicking on the ‘Start Your Free Trial’ button in the top right corner of the screen.
Nutrifox offers a 14-day trial to everyone, after which you will be charged about $9/month or $89/year.
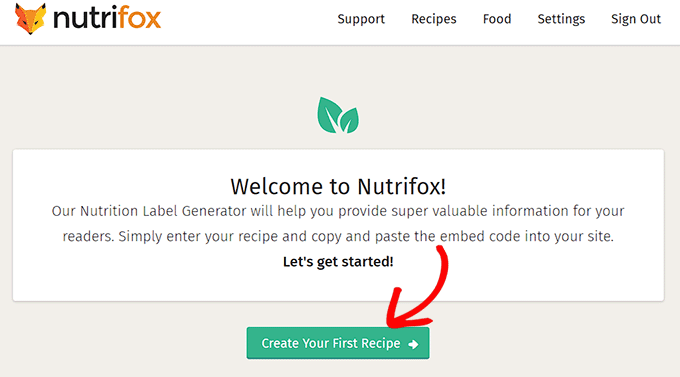
Upon creating an account, you will be directed to the ‘Welcome to Nutrifox’ page.
From here, simply click on the ‘Create Your First Recipe’ button to get started.
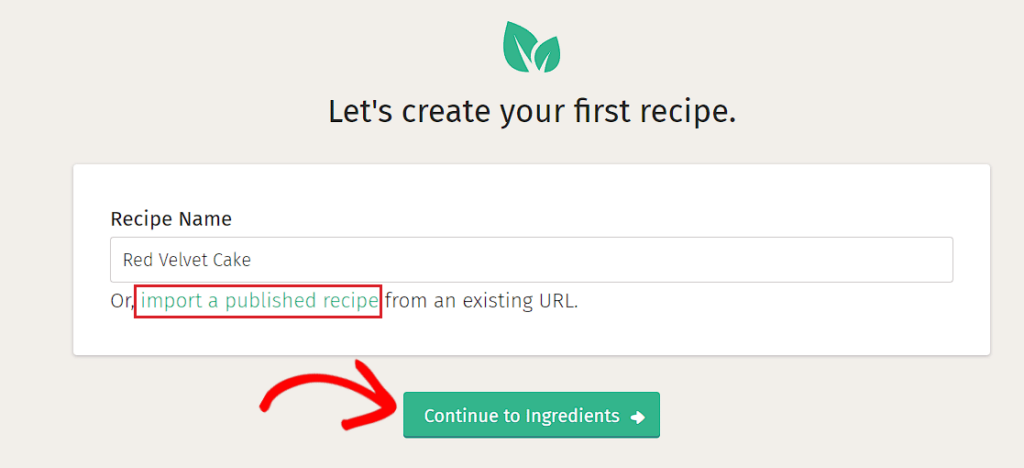
Next, you will be directed to a new screen, where you must enter a name for the recipe that you are about to create.
Once you have added a recipe name, just click the ‘Continue to Ingredients’ button.
Note: If you want, then you can also import a published recipe to Nutrifox from your WordPress website by clicking on the ‘import a published recipe’ link.
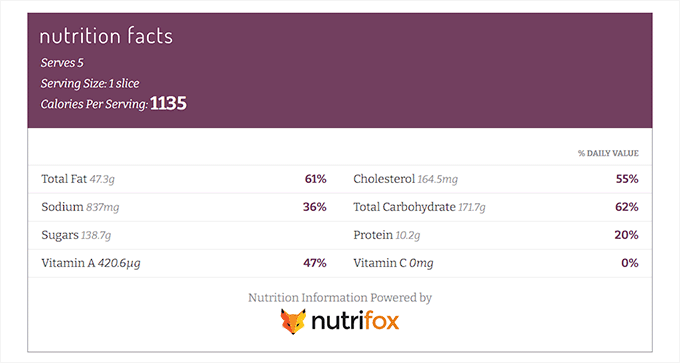
This will take you to a new screen where you will create the recipe. Here, you will be able to see the nutrition facts label in the right column of the screen.
You can now start by filling in the fields for the serving size and the number of servings.
For instance, if you are writing a recipe for a red velvet cake, then you will need to add 1 slice as the serving size. After that, you must add the number of slices that will be in the cake under the ‘Servings’ option.
Once you have done that, simply type the recipe ingredients into the ‘Ingredients’ section and click the ‘Add’ button.
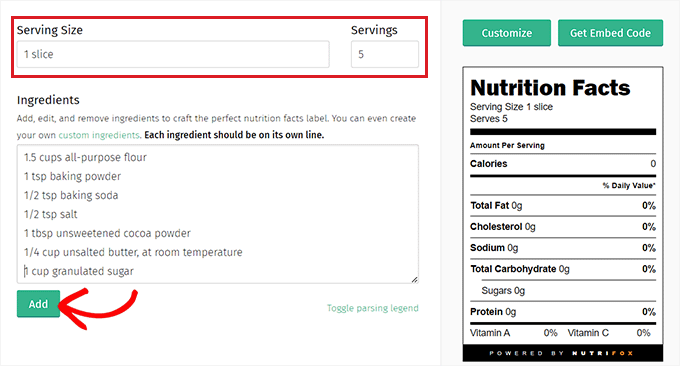
After the recipe has been added, the nutrition facts label will automatically update.
Customize Your Nutrition Facts Labels
Now, you have to click on the ‘Customize’ button in the right column to style the facts label.
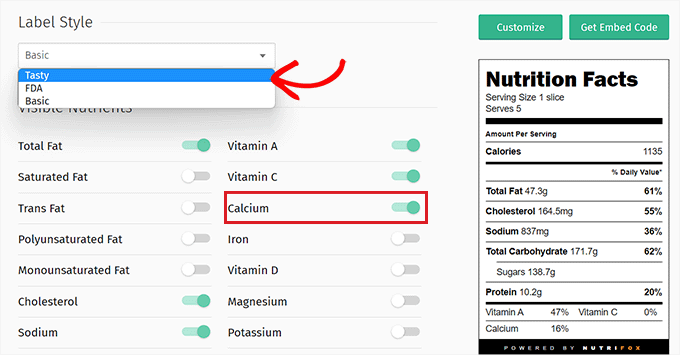
From here, go ahead and choose the ‘Label Style’ from the dropdown menu. You can pick ‘Tasty’, ‘FDA’, or ‘Basic’.
After that, you can also select the nutrients that you want to be displayed on the nutrition facts label by toggling the switch next to these options.
For instance, if you want to display the percentage of calcium in the meal, then you need to toggle the switch next to the ‘Calcium’ option.
Once you are happy with your nutrition facts label, you need to copy the label’s
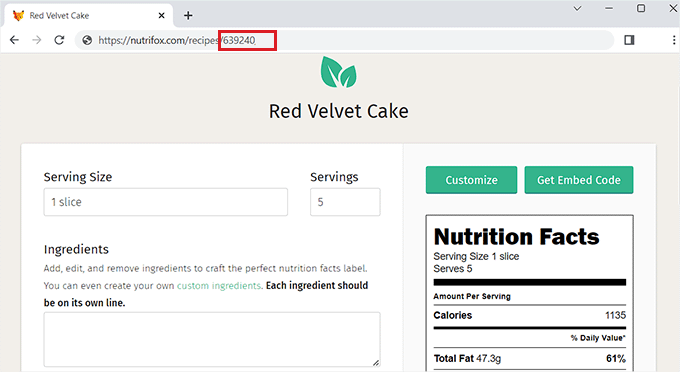
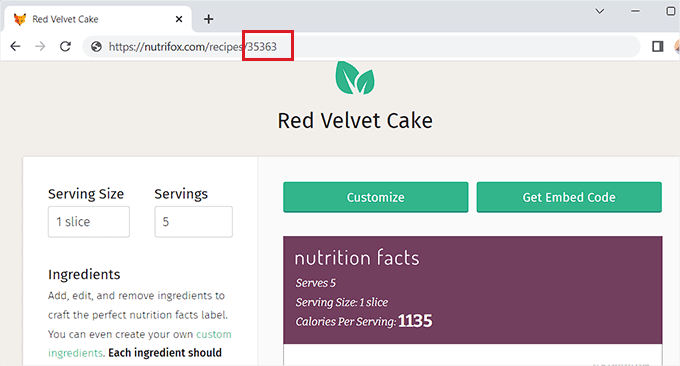
Once you are happy with your nutrition facts label, you need to copy its ID from the Nutrifox website’s URL.
This label ID is a 4 to 5-digit number that will allow you to embed the facts label into your WordPress website.
Add the Nutrition Facts Labels to a WordPress Post
After copying the label ID, head over to your WordPress website’s dashboard.
Once you are there, you need to install and activate the Nutrifox WP Connector plugin. For more instructions, please see our step-by-step guide on how to install a WordPress plugin.
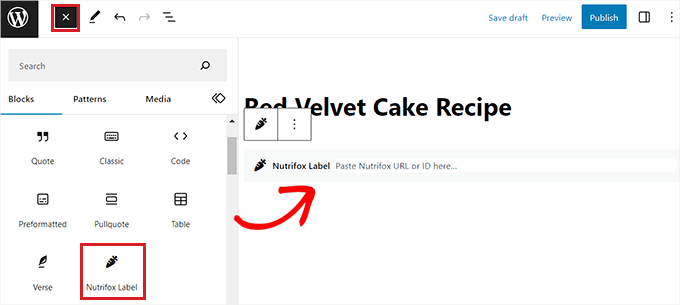
This plugin will add a ‘Nutrifox label’ block to the Gutenberg editor that will allow you to show nutrition facts labels along with your recipes.
Upon plugin activation, open up the page or post where you want to add the facts label. Next, you must click the ‘+’ button in the top left corner of the screen and find the ‘Nutrifox Label’ block.
Upon adding the block, simply paste the Nutrifox label ID that you copied earlier into the block.
Finally, go ahead and click the ‘Publish’ or ‘Update’ button to save your changes.
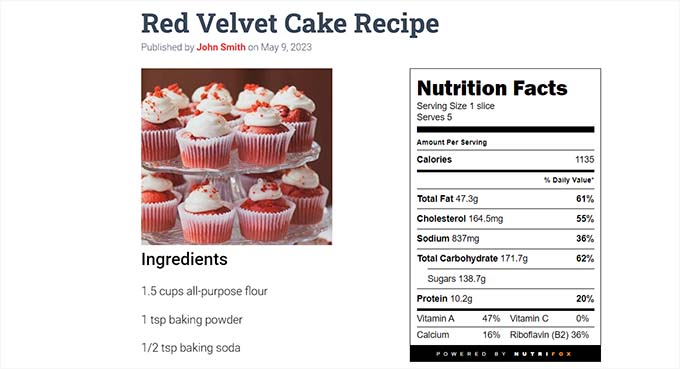
You can now visit your website to check out the nutrition facts label in action.
Bonus: Use Tasty Recipes to Optimize Your Food Blog and Add Nutrition Facts Labels
Tasty Recipes is a great WordPress recipe plugin that allows you to optimize your food blog for recipe SEO. It also lets you adjust the design and layout of your recipe cards.
Additionally, it enables you to integrate your recipe cards with Nutrifox to add nutrition facts labels along with the recipes.
First, you need to install and activate the Tasty Recipes plugin. For detailed instructions, check our guide on how to install a WordPress plugin.
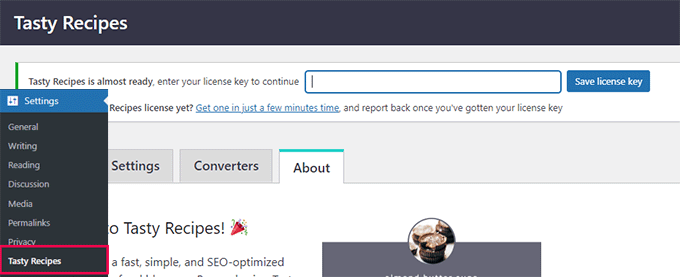
Upon activation, head over to the Settings » Tasty Recipes page and enter the license key. You can get your license key from your Tasty Recipes accounts page.
After that, simply switch to the ‘Design’ tab on the ‘Tasty Recipes’ page.
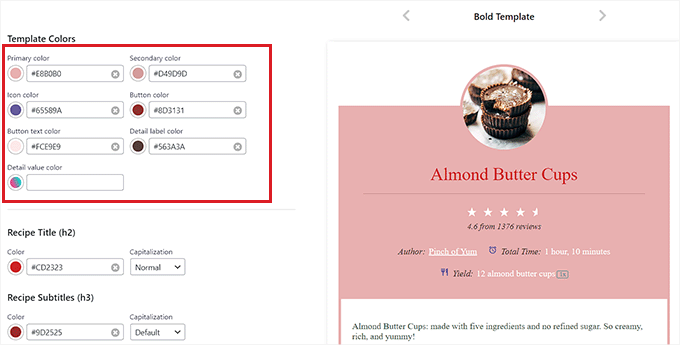
From here, you can choose a design template for the recipe card from the preview column on the right.
You can also further customize the template with the on-screen settings on the left of the screen.
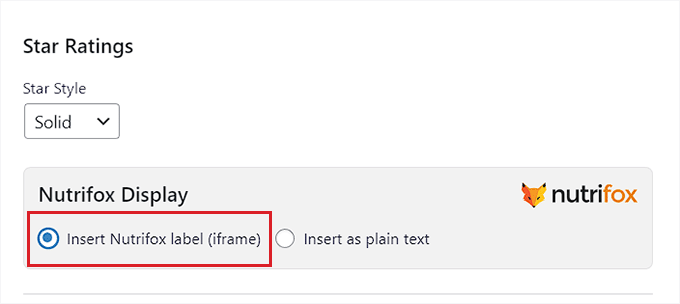
Once you have designed your recipe card template, scroll down to the ‘Nutrifox Display’ section and make sure that the ‘Insert Nutrifox label (iframe)’ option is checked.
If you choose the ‘Insert as plain text’ option, you will need to manually enter the details for the nutrition facts labels.
Once you are happy with your choices, don’t forget to click the ‘Save Changes’ button to store your settings.
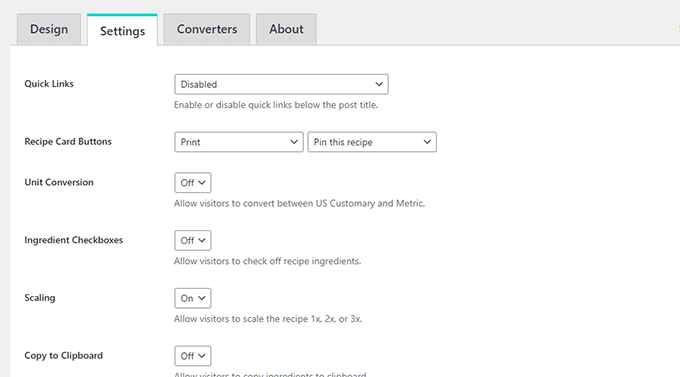
Next, switch to the ‘Settings’ tab at the top to configure the plugin options.
From here, you can choose which buttons to show on the recipes, display check boxes next to ingredients, allow users to convert units, and scale recipes for different serving sizes.
You can also allow users to copy the ingredients with a single click and paste the recipe somewhere else.
Finally, don’t forget to click on the ‘Save Changes’ button to store your changes.
Add the Recipe Card and Nutrition Facts Label to a WordPress Post
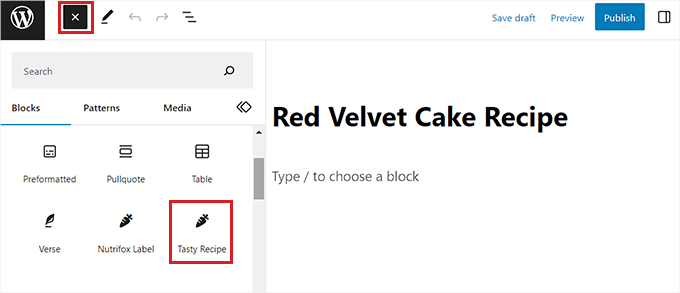
To add the recipe card and nutrition facts label to your website, you need to open up a new or existing post in the block editor from the WordPress admin sidebar.
Once you are there, simply click on the ‘+’ button in the top left corner of the screen and find the ‘Tasty Recipe’ block.
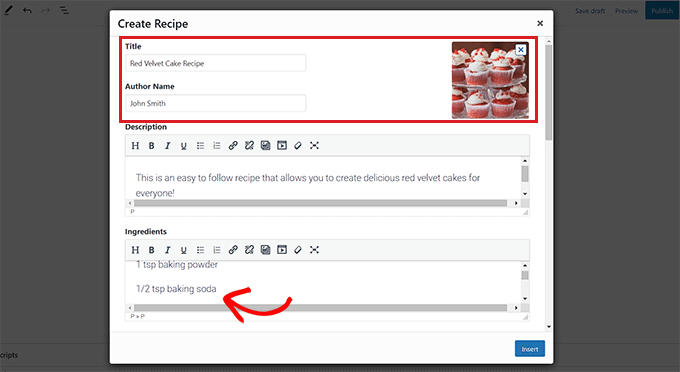
Upon adding the block, a ‘Create Recipe’ popup will open in the block editor. Here, you can start by adding a title, description, image, and author name for the recipe card.
Next, type the ingredients for the recipe into the ‘Ingredients’ section and add the instructions for users to follow in the ‘Instructions’ section.
After that, just scroll down to the ‘Nutrition’ section, where you have to add the label ID for the nutrition fact labels.
For that, you will have to visit the Nutrifox website and open up the nutrition facts label that you want to integrate with the recipe.
Once you are there, you can get the label ID from the website’s URL. It will be a 4 to 5-digit number at the end of the URL.
Simply copy it and head back to your WordPress dashboard.
Next, you have to paste the label ID into the ‘Nutrifox ID’ box. Once you are done, just click the ‘Insert’ button to add the recipe card to the block editor.

Finally, click the ‘Update’ or ‘Publish’ button to save your changes.
You can now visit your website to check out the recipe card with the nutrition facts label integrated into it.
We hope this article helped you learn how to display nutrition facts labels in WordPress. You may also want to see our tutorial on how to add SEO-friendly recipe schema in WordPress and our top picks for the best WordPress themes for recipe blogs.
If you liked this article, then please subscribe to our YouTube Channel for WordPress video tutorials. You can also find us on Twitter and Facebook.
The post How to Display Nutrition Facts Labels in WordPress first appeared on WPBeginner.
این خبر را در ایران وب سازان مرجع وب و فناوری دنبال کنید