How to Add Tables in WordPress Posts and Pages (No HTML Required)
Do you want to add tables to WordPress posts and pages?
Tables are a great way to display data in an understandable format. WordPress offers easy ways to content inside tables with some formatting and design options.
In this article, we will show you how to create tables in WordPress posts and pages without using a plugin or any HTML code. We will also cover how to create advanced tables in WordPress with sorting and search features.

Video Tutorial
If you prefer written instructions, then just keep reading.
Creating Tables in the WordPress Block Editor
WordPress makes it super easy to add tables using the default WordPress block editor.
Simply create a new post or page, or edit an existing one. Once inside the content editor, click the ‘+’ symbol to add a new block, then select the Table block.
You can find it under the ‘Text’ section, or you can type ‘Table’ into the search bar.

Next, you will be prompted to choose how many columns and rows you want for your table. Both figures default to 2.
Don’t worry if you are not 100% sure about the exact number because you can always add/remove table columns and rows later.
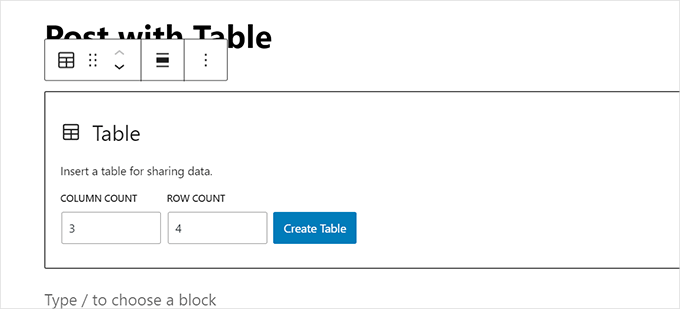
Simply enter the number of rows and columns and click the ‘Create Table’ button.
The block will then generate your table and display it on the screen.
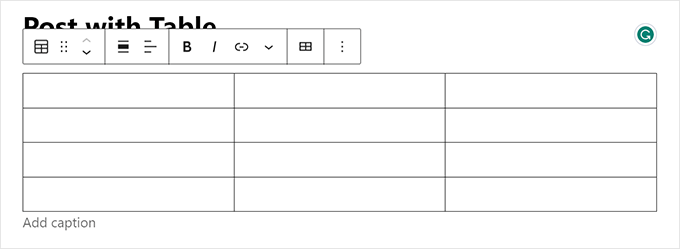
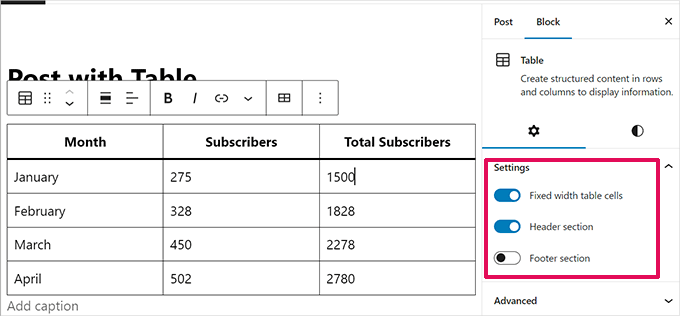
You can type in the table cells, and they will automatically resize depending on how much content is in each one.
You can set this option on the right side if you prefer your cells to be fixed-width. Here, you can also add a table header or footer section.
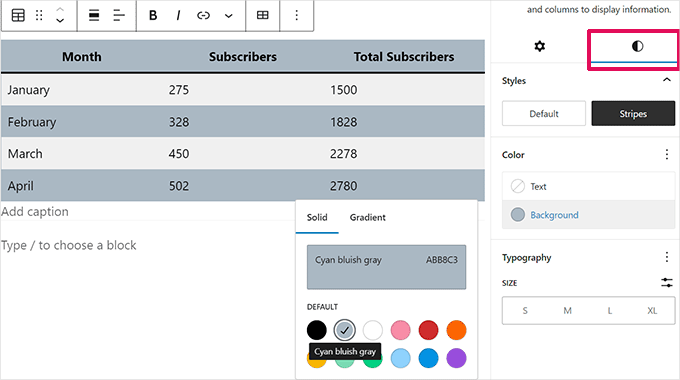
From the settings panel, you can also switch to the Style tab.
Your WordPress theme may offer a bunch of styles for the table block, or you can choose the background and text colors.
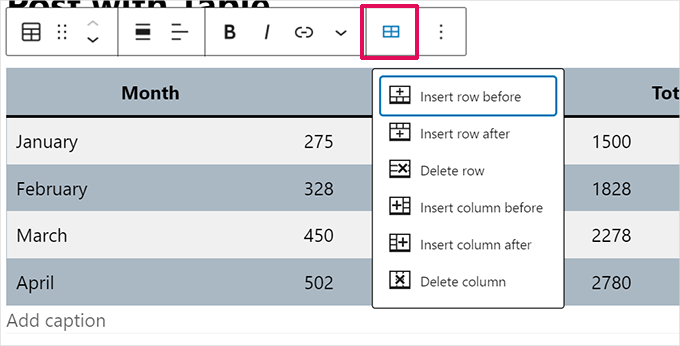
If you want to add a new row or column, just click on a cell at the point in the table where you want to add it. Next, click the ‘Edit Table’ button.
This will show a bunch of options to add or remove rows and columns to your table.
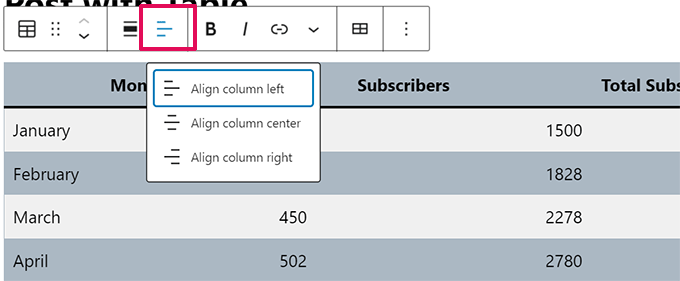
By default, the text in your table’s columns is aligned to the left.
You can change this by clicking inside a column and then clicking the ‘Change Column Alignment’ button:
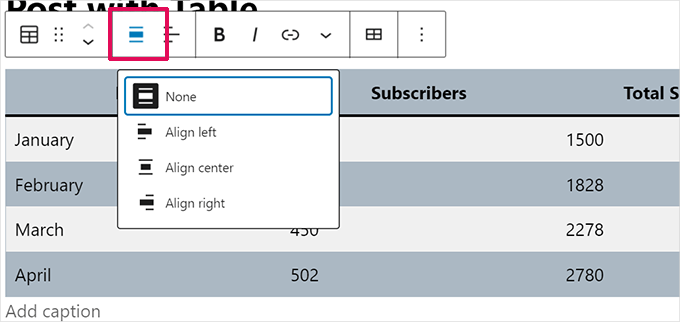
You can also change the alignment of your whole table within the post or page.
Just click the ‘Change alignment’ button and select an option from the list.
Note that these options can make your table display beyond the normal boundaries of your post area.
Some may look odd on your WordPress website, so please preview your post or page to check how the table will appear.
Here’s our table set to ‘Wide Width’ as it appears on our demo site:

As you can see, it stretches out beyond the left and right margins of the post area.
The table tools built into the Gutenberg editor give you a lot of flexibility over how you can display your tables. You can use the Table block to show your data to readers in an easy-to-understand format.
However, the block doesn’t have advanced features like search filtering, custom sorting, and more. It also doesn’t let you efficiently use the same table across multiple areas of your website, such as sidebar widgets or other pages.
To create advanced tables, you will need to use a WordPress table plugin.
Creating Tables Using the TablePress Plugin
TablePress is one of the best WordPress tables plugins on the market. It is a free plugin and allows you to create and manage tables easily. Plus, you can edit your table separately and even add a large number of rows.
TablePress also becomes necessary if you are using the older classic WordPress editor, which does not come with table functionality.
First, you need to install and activate the TablePress plugin. For more details, see our step-by-step guide on how to install a WordPress plugin.
You will then see a TablePress menu item in your WordPress dashboard. Go to TablePress » Add New to create a new table.
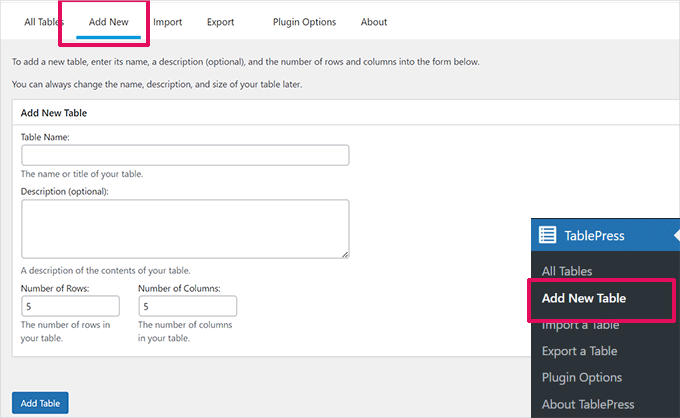
You need to type in a name for your table and decide how many rows and columns you want. You can always add/remove table rows and columns later as well.
Once you have added the table name, rows, and columns, go ahead and click the ‘Add Table’ button to create your table.
Next, you will see a screen with your table’s information and an area where you can add content.
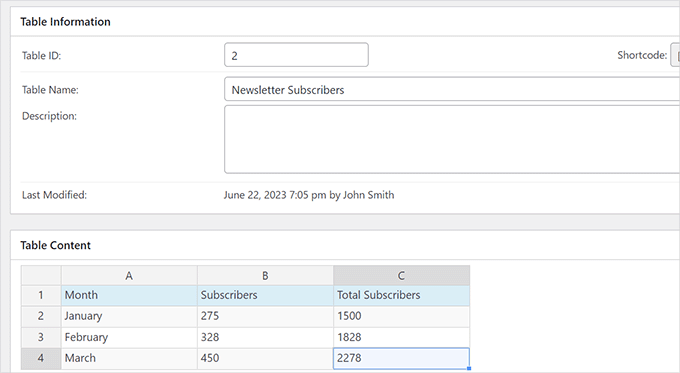
Simply type the data you want into the cells of your table.
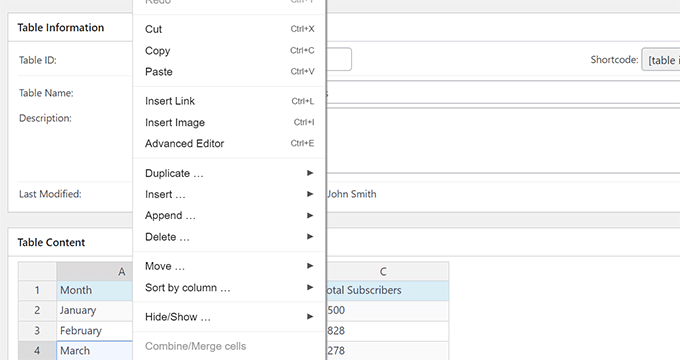
To add or remove rows and columns or perform sorting operations, simply right-click inside the table. This will show an options menu where you can make more changes.
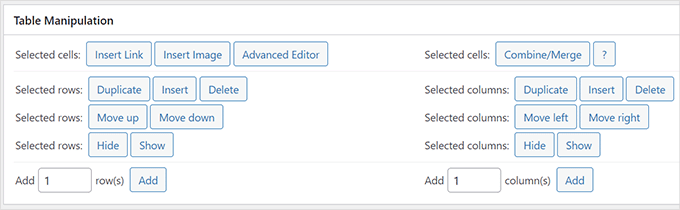
There are advanced options below the ‘Table Content’ area, such as ‘Table Manipulation’.
From here, you can do things like adding, removing, and duplicating rows.
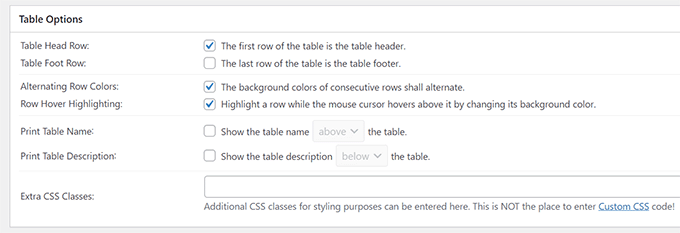
In ‘Table Options’, you can add a header and/or footer row, which won’t be sorted in with the data.
You can also decide where to show the table name and description:
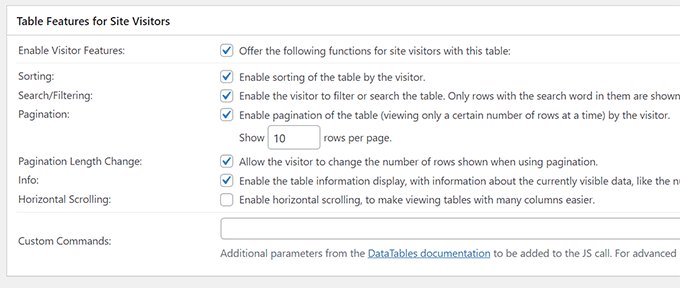
Finally, you can set various options in the ‘Table Features for Site Visitors’ section.
These settings allow you to create responsive tables that can be filtered, searched, and sorted by your readers.
Once you are happy with your table, just click ‘Save Changes’.
After that, copy the Table shortcode. You will need it in the next step.
Now, edit the post or page where you want to display the table and add the Shortcode block to the editor.
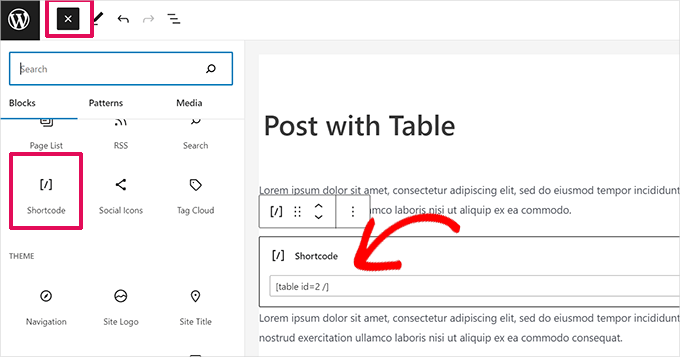
After that, add the shortcode you copied earlier into the Shortcode block.
Don’t forget to update or save your changes.
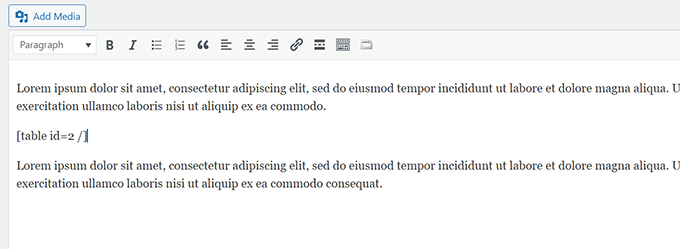
On the other hand, if you are using the classic editor, then simply add the shortcode straight into your post:
If you want to change your table in the future, you can return to TablePress in your dashboard and make changes. Your table will be automatically updated in any posts and pages you have used it in.
TablePress also allows you to import data from spreadsheets and CSV files. Similarly, you can also export TablePress table data to a CSV file, which you can then open with any spreadsheet program like Microsoft Excel or Google Sheets.
We hope this article helped you learn how to add tables in WordPress posts and pages without using HTML. You might also like our guide on how to create a table of contents in WordPress and our expert picks for the best WordPress table plugins.
If you liked this article, then please subscribe to our YouTube Channel for WordPress video tutorials. You can also find us on Twitter and Facebook.
The post How to Add Tables in WordPress Posts and Pages (No HTML Required) first appeared on WPBeginner.
این خبر را در ایران وب سازان مرجع وب و فناوری دنبال کنید