روش های متنوعی برای افزایش سرعت فروشگاه ووکامرس وجود دارد. سرعت برای یک سایت تجاری پول است. هر چه سایت شما سریعتر بارگذاری شود، تجربه خرید بهتری خواهید داشت. تجربه کاربری بهتر به بهبود سئو، افزایش بازدید و مشتریان راضی تر تلقی می شود. این در نهایت منجر به درآمد و سود بیشتر خواهد شد. کاربران و خریداران امروزه انتظار دارند تصاویر و ویدیوهایی با وضوح بالا، نظرات مختلف کاربران، موجود بدون کالا، شخصیسازی و مجموعهای از ابزارهای پویا دیگر را داشته باشند.
WooCommerce محبوب ترین پلت فرم برای فرووشگاه های آنلاین در جهان است و برای استفاده و تنظیم بر اساس نیاز شما رایگان ارائه شده است. فروشگاه هایی که با ووکامرس راه اندازی شده اند همیشه دغدغه فروش بیشتر را داشته اند. در این مقاله روش های قدرتمند برای افزایش سرعت WooCommerce را با هم بررسی می کنیم.
با ووکامرس همراه باشید ?
چرا سرعت برای فروشگاه آنلاین اهمیت دارد؟
اولین ورود کاربر به سایت شما همیشه مهم است و سرعت اولین چیزی است که کاربر در مورد سایت شما متوجه می شود. در یک مطالعه توسط گوگل، 53 درصد از کاربران تلفن همراه در صورتی که بارگذاری سایت بیش از 3 ثانیه طول بکشد، آن را ترک کردند. وقتی بارگذاری یک وب سایت آهسته و کند باشد پس زا کذشت زمان از کار خواهد افتاد. در این شرایط کاربران به سایت رقیب رو می آورند و به این ترتیب کندی سایت شما باعث بالا رفتن مخاطبان رقیبتان خواهد شد.
جدا از تجربه کاربری، سرعت سایت شما نیز بر سئو تاثیر می گذارد. سرعت و عملکرد وب سایت عامل اصلی در الگوریتم رتبه بندی سایت گوگل است. این روزها اکثر افراد از تلفن همراه برای وب گردی استفاده می کنند بنابراین خیلی مهم است که وب سایت شما علاوه بر جستجوهای کامپیوتر و لپ تاپ در تلفن همرا هم نتایج خوبی داشته باشد.
اندازه گیری سرعت فروشگاه ووکامرس
آنچه را که نمی توانید اندازه گیری کنید، نمی توانید بهبود ببخشید!
اکنون که فهمیدید چرا سرعت برای فروشگاه ووکامرس شما مهم است، وقت آن رسیده است که یاد بگیرید چگونه آن را اندازه گیری کنید. هنگامی که می خواهید سرعت سایت وردپرس خود را افزایش دهید، دانستن چگونگی ارزیابی پیشرفت ها ضروری است.
تست سرعت وب سایت ابزاری عالی برای تست واکنش پذیری فروشگاه ووکامرس شما است. اما اگر این کار را به درستی انجام ندهید، ممکن است سایت شما پس از ایجاد تغییر، زمانی که سریعتر باشد، کندتر به نظر برسد. توصیه می کنیم با یکی از این ابزارهای تست سرعت وب سایت شروع کنید: WebPagetest، Pingdom، Google PageSpeed Insights یا GTMetrix.
هیچ ابزار تست سرعتی کامل نیست، اما یکی را انتخاب کنید و تا انتها با آن پیش بروید. در حقیقت بین عملکرد واقعی و عملکرد اندازه گیری شده تفاوت وجود دارد. بنابراین، از تکنیک های ذکر شده در زیر برای بهبود تجربه کاربری کلی سایت خود استفاده کنید، نه اینکه فقط امتیازی با سرعت بالا کسب کنید.
روش های افزایش سرعت فروشگاه ووکامرس
گزارش تست سرعت به شما یک برنامه عملی برای بهینه سازی سایت کند ووکامرس می دهد. پس بیایید تا با هم شروع کنیم!
1. انتخاب یک قالب سریع ووکامرس

استفاده از یک تم مناسب ووکامرس اهمیت دارد. صدها هزار تم وجود دارند که ما برای انتخاب آنها قطعا دچار سردرگمی خواهید شد. بنابراین تصمیم گیری در مورد یکی از آنها که برای وب سایت شما مناسب است همیشه یک چالش خواهد بود. یک قالب زیبا با ویژگیهای ظاهری شگفتانگیز میتواند روی کاغذ عالی به نظر برسد، اما ممکن است در استفاده واقعی شما را دچار چالش کند. برای یک سایت تجاری، باید اطمینان حاصل کنید که کاملاً با WooCommerce سازگار است.
قالب های وب سایت مانند Tethys ، woodmart و Razzi بسیار سریع و سبک هستند. هنگامی که با یک صفحه ساز مانند Elementor جفت می شوند، می توانند به شما در ایجاد تقریباً هر سایتی کمک کنند و در نهایت باعث افزایش سرعت فروشگاه ووکامرس شما خواهد شد.
2. انتخاب افزونه های ووکامرس سبک برای افزایش سرعت فروشگاه ووکامرس
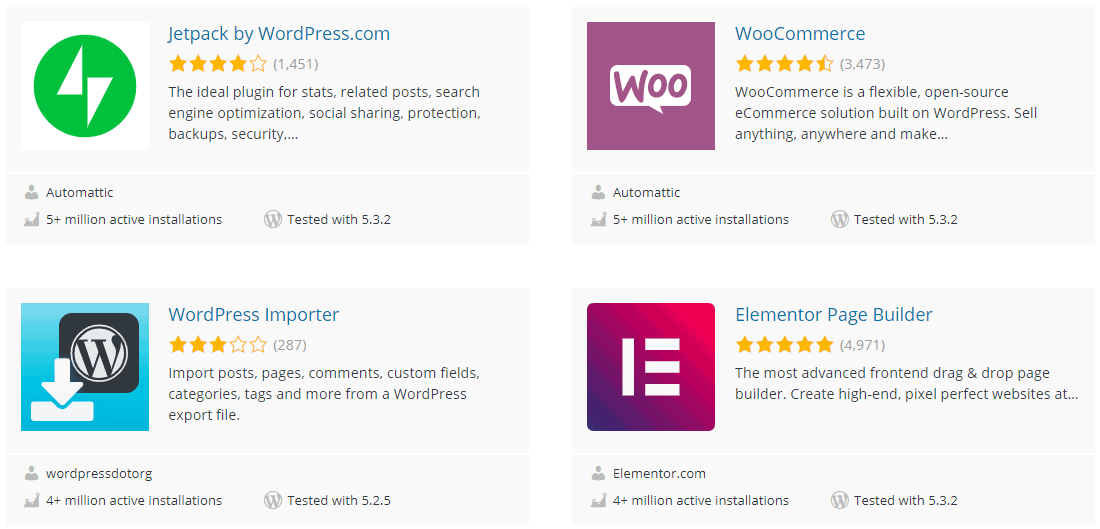
بیش از 54 هزار افزونه در مخزن وردپرس وجود دارد که میتوانید به راحتی هر یک دانلود و نصب کنید. بسیاری از افزونه های محبوب، به ویژه افزونه های مرتبط با عملکرد و امنیت، در محیط های میزبانی خاص به خوبی کار نمی کنند.
اگر تصمیم گیری برای نصب این افزونه ها برای شما سخت است، میتوانید از افزونه های معرفی شده در ووکامرس کمک بگیرید. از سئو گرفته تا فشرده سازی تصویر، مطمئناً برخی از منتخب های خود را در آنجا پیدا خواهید کرد. فراموش نکنید قابلیت ووکامرس را می توان با طیف گسترده ای از افزونه های رایگان و ممتاز گسترش داد.
3. افزایش محدودیت حافظه وردپرس
وردپرس به طور پیش فرض 32 مگابایت حافظه برای PHP اختصاص می دهد. اگر با هر گونه مشکلی مواجه شد، به طور خودکار سعی میکند این محدودیت را به 40 مگابایت (برای یک سایت) یا 64 مگابایت (برای چند سایت) افزایش دهد.
در بیشتر موارد، این محدودیت حافظه برای یک سایت WooCommerce کافی نخواهد بود. حتی ممکن است پیام خطایی در داشبورد خود دریافت کنید مانند: “اندازه حافظه مجاز xxxxxx بایت تمام شده است”.
توصیه می شود این محدودیت را به 256 مگابایت افزایش دهید. همیشه قبل از ویرایش از هر فایلی یک نسخه پشتیبان تهیه کنید. در صورت بروز مشکل، می توانید فایل ویرایش شده را با فایل اصلی جایگزین کنید.
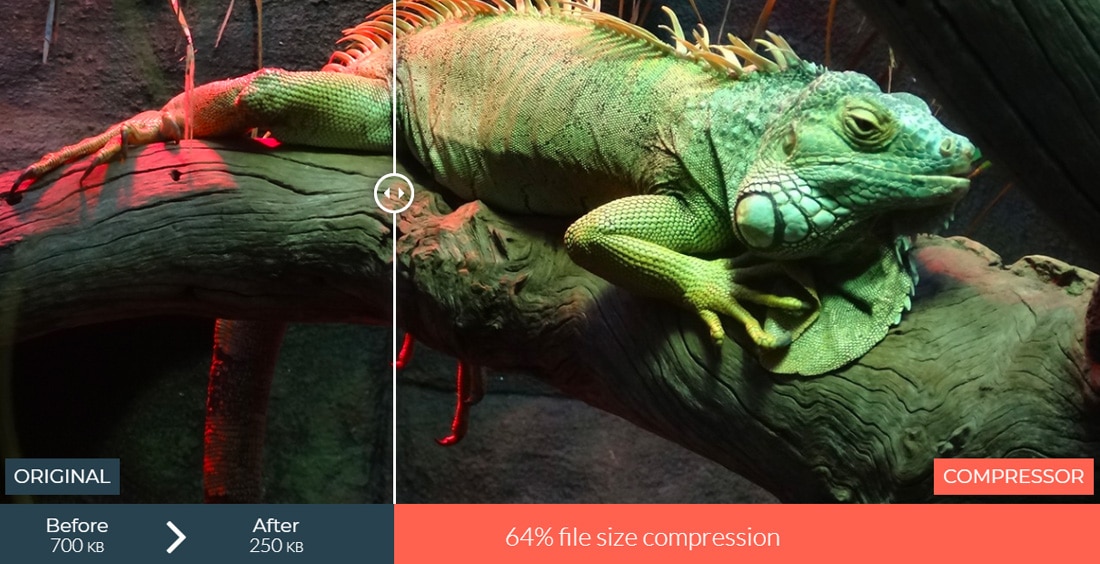
4. فشرده سازی تصاویر و بهینه سازی تحویل
تصاویر بخش عمده ای از هر صفحه وب سایت را تشکیل می دهند، برای یک سایت فروشگاهی این میزان بیشتر می شود. سایت های ووکامرس با تصاویر و بنرهای محصول بارگذاری می شوند. اگر تصاویر را بهینه نکنید، آنها می توانند وب سایت شما را بسیار کند کنند.در حالی که ویدئوها منبع سنگینتری نسبت به تصاویر هستند، در بیشتر موارد بر حسب تقاضا بارگیری میشوند.از این رو، آنها به اندازه تصاویر بر سرعت بارگذاری صفحه تأثیر نمی گذارند.
3 قانون برای بهینه سازی تصاویر در فروشگاه ووکامرس
- فرمت مناسب برای تصاویر خود (JPEG، PNG، SVG، WebP) انتخاب کنید.
- با استفاده از ابزار مناسب، تصاویر را به طور موثر فشرده کنید.
- از تصاویر واکنش گرا برای بهینه سازی برای دستگاه های مختلف استفاده کنید.
در نهایت با فشرده سازی تصاویر و بهینه کردن آن ها تا میزان زیادی در افزایش سرعت فروشگاه ووکامرس موثر واقع شوید.
5. حذف اسکریپت ها و شیت های استفاده نشده
اکثر مضامین و افزونه های وردپرس اسکریپت ها و شیوه نامه ها را در تمام صفحات سایت شما بارگذاری می کنند. آنها این موارد را حتی زمانی که در صفحه استفاده نمی شوند بارگیری می کنند.
حذف این موارد بلااستفاده از صفحات به شما کمک می کند تا زمان بارگذاری صفحه را افزایش دهید. WooCommerce و برنامه های افزودنی آن (به عنوان مثال، کوپن های هوشمند و پیگیری ها) در معرض این مشکل هستند.
به عنوان مثال، بارگیری اسکریپت های مربوط به درگاه های پرداخت در صفحه اصلی فروشگاه یا صفحه فروشگاه شما ضروری نیست. میتوانید چنین اسکریپتهایی را محدود کنید تا فقط در صفحات پرداخت و تأیید سفارش بارگذاری شوند. به همین ترتیب، اسکریپت ها را از صفحه پرداخت خود حذف کنید. حذف اسکریپت ها تا میزان زیادی با افزایش سرعت فروشگاه ووکامرس همراه است.
6. استفاده از کش برای افزایش سرعت فروشگاه ووکامرس
حافظه پنهان (کش) به طور موقت منابع را از یک درخواست ذخیره می کند تا درخواست های بعدی به سرعت اجرا شوند. کش را می توان روی سرور یا دستگاه کاربر ذخیره کرد. این یکی از سادهترین راهها برای افزایش سرعت فروشگاه ووکامرس است و همچنین مهمترین آنهاست.
فرض کنید کاربر از طریق مرورگر خود برای وب سایت www.woocommerce.ir را جستجو می کند. سپس مرورگر یک صفحه وب (سند HTML) را برای نمایش به کاربر درخواست می کند. یک سرور DNS این درخواست را انجام می دهد که منجر به فاش شدن IP سرور میزبان می شود.
بازگرداندن صفحه وب توسط یک برنامه کاربردی (به عنوان مثال وردپرس، جوملا و غیره) که بر روی یک وب سرور میزبانی می شود، انجام می شود. با وبسایتهای ایستا، ممکن است برنامه کاربردی حتی ضروری نباشد.
برنامه اسکریپت ها (مانند PHP، جاوا اسکریپت و غیره) را اجرا می کند و پایگاه داده (مانند MySQL، MongoDB و غیره) را برای ساخت یک صفحه وب جستجو می کند. سپس صفحه وب را به مرورگر برمی گرداند که آن را رندر می کند و به کاربر نشان می دهد.
اگر همه چیز به آرامی کار کند، تمام مراحل بالا باید حداکثر چند ثانیه طول بکشد تا اجرا شوند. اما این فقط یک درخواست از یک کاربر است. اگر چندین درخواست از هزاران کاربر به طور همزمان وجود داشته باشد چه؟ این امر بار زیادی را روی سرور وارد می کند و در نهایت منجر به یک وب سایت کندتر می شود.
اینجاست که حافظه پنهان به کمک می آید. این مقدار کار مورد نیاز برای ایجاد نمای صفحه را کاهش می دهد، بنابراین وابستگی وردپرس به PHP و پایگاه داده را کاهش می دهد. ذخیره سازی باعث می شود وردپرس تقریباً به همان سرعت وب سایت های ایستا عمل کند و سبب افزایش سرعت فروشگاه ووکامرس خواهد شد.
7. بهینه سازی دیتابیس برای افزایش سرعت فروشگاه ووکامرس
پایگاه داده مجموعه ای سازمان یافته از تمام داده های وب سایت شما است. فروشگاه ووکامرس، شامل موارد زیر است:
- محتوای سایت مانند صفحات محصول، دستهها، برچسبها، دادههای کاربر، نظرات، تنظیمات سایت، تم، افزونهها و غیره.
- داده های تراکنش مانند جزئیات سفارش، پرداخت ها، موجودی و غیره.
هر بار که یک کاربر از فروشگاه شما بازدید می کند، محتوای سایت شما را درخواست می کند که بیشتر ثابت است و تغییر زیادی نمی کند. اما زمانی که آنها سفارش می دهند، یک درخواست پویا می کنند.
اگر پایگاه داده فروشگاه خود را بهینه نکنید، ممکن است پردازش این درخواست ها خیلی طول بکشد. در نهایت، زمان پاسخ آهسته سرور منجر به کندی وب سایت می شود. از این رو باید پایگاه داده را با حذف موارد غیر ضروری پاکسازی و بهینه کنید.
در ادامه روش هایی برای افزایش سرعت و تنظیم دقیق پایگاه داده WooCommerce ارائه داده ایم:
- حذف نسخه های قدیمی
- محدود کردن تعداد ویرایش های ذخیره شده
- غیرفعالسازی ویرایش ها (اگر ضروری نیستند)
- پاکسازی موارد گذرا منقضی شده
- پاکسازی جداول پایگاه داده
8. بهنیه سازی حالت واکنشگرا برای موبایل
در سال های اخیر کاربران موبایل جزء اصلی وب گردی شده اند زیرا تقریبا اکثر آنها با تلفن همراه سروکار دارند. طبق آمار در حال حاضر کاربران موبایل بیشتر از کاربران دسکتاپ هستند و این به این معنی است که فضای گستردهای برای رشد وجود دارد. بنابراین قبل از هر چیز باید ابتدا وب سایت خود را برای حالت موبایل بهینه کنید تا بتوانید رضایت درصد زیادی از کاربران را جلب نمایید.

9. بهینه سازی پنل مدیریت ووکامرس
سرعت عامل مهمی برای ظاهر فروشگاه شما نیست. یک بکاند سریع به همان اندازه برای مدیریت فروشگاه خود حیاتی است و در افزایش سرعت فروشگاه ووکامرس تاثیر دارد. با این کار شما به وب سایت خود سرعت می بخشید. کار موثر بر روی پنل مدیریت WooCommerce، کلید سازنده بودن است. همچنین وقت شما را برای انجام کارهای ضروری تری برای موفقیت فروشگاه خود، مانند بازاریابی آنلاین، آزاد می کند.
10. بروزرسانی مرتب جهت افزایش سرعت فروشگاه ووکامرس
حتماً وردپرس، ووکامرس، افزونهها، برنامههای افزودنی و قالب وب سایت را مرتباً بهروزرسانی کنید.اگر یک تم یا افزونه دیگر توسط توسعهدهندگانش پشتیبانی نمیشود، وقت آن است که آنها را کنار بگذارید.به همین ترتیب، اگر یک تم یا افزونه به داشبورد شما زمان می افزاید به دنبال جایگزینهای بهتری باشید.
این مشکل به قدری رایج است که افزونه هایی وجود دارند که صرفاً به حذف زمن تلف شده از برخی از محبوب ترین افزونه های وردپرس اختصاص داده شده اند.
سرعت ووکامرس با هاست با کیفیت شروع می شود
درست مانند راهاندازی یک ماشین با لاستیکهای پنچر شده، مهم نیست که چقدر بهینهسازی انجام میدهید، اگر سایت شما روی یک سرور ضعیف میزبانی شود، سریعتر نمیشود. بخش قابل توجهی از عملکرد سایت شما به کیفیت میزبانی شما بستگی دارد و باعث افزایش سرعت فروشگاه ووکامرس شما خواهد شد.
انواع مختلفی از هاست برای سایت های وردپرسی وجود دارد که در دو دسته اصلی قرار می گیرند: مدیریت شده و مدیریت نشده. اولین مورد برای اکثر کاربران عالی است، زیرا ارائه دهنده هاست تمام بهینه سازی های سرور برای وردپرس را انجام می دهد. دومی برای کاربرانی که از نظر فنی ماهر هستند و می توانند سرور را به تنهایی تغییر دهند و مدیریت کنند، مناسب تر است. برای یک وب سایت ووکامرس از هاست مدیریت شده استفاده کنید.
شما می توانید از میان 4 نوع اصلی هاست وردپرس مدیریت شده را انتخاب کنید. هر کدام مزایا و معایب خاص خود را دارند، بنابراین یکی را انتخاب کنید که با بودجه و اهداف شما همسو باشد.
در پایان
زمان برای یک سایت فروشگاه آنلاین به معنای واقعی کلمه پول است. یک فروشگاه سریع ووکامرس تجربه کاربر، سئو، درآمد و بازگشت سرمایه را افزایش می دهد.
در حالی که لازم نیست تمام نکات بهینه سازی سرعت ذکر شده در این مقاله را انچام دهید، توصیه می کنیم همه آنها را مرور کنید. این به شما کمک می کند تا هر گونه گلوگاه در سایت خود را شناسایی کنید و باعث افزایش سرعت فروشگاه ووکامرس خود شوید. هیچ کس دوست ندارد منتظر بارگذاری یک سایت باشد. بیایید ووکامرس آن را افزایش دهیم!
این مطلب از سایت ووکامرس فارسی گردآوری شده و صرفا چهت اگاه سازی است.